
Replacing the dashboard of the VAZ 2114. The backlight of the dashboard does not work. Solution
The dashboard on the VAZ 2114 allows the driver to control engine data, monitor the remaining amount of fuel, his speed, and other data. The panel should be maintained in working order so that the idle backlight does not cause discomfort, and the sensors show real values.
But quite often, the owners of the VAZ 2114 find that the instrument panel backlight is not on. If such a situation arises, appropriate actions should be taken immediately to eliminate it.
Why is the dashboard not working?
The first step is to figure out why the instrument panel on the VAZ 2114 does not work. If the backlight is off, there may be several reasons for this:
- The incandescent lamps burned out, the LED backlight groups stopped working;
- Connectors oxidized;
- The wiring is faulty, there are defects in the circuit;
- The fuse block has stopped working;
- Damage appeared on the common contact board;
- The dimension system is corrupted;
- There is no minus on the body (mass).
Removing the dashboard
To replace light bulbs in dashboard VAZ 2114, it will first have to be dismantled. Without this event, you will not be able to access the problem device in any way.
Therefore, now we will figure out how to disassemble the instrument panel on the VAZ 2114:
- Unscrew three self-tapping screws, dismantle the lining and the protrusion from below. It comes out of your vehicle's body bracket;
- Now dismantle five more self-tapping screws located on the right overlay of the console;
- Remove the shield; Disconnect the negative terminal with battery;
- Disconnect the wiring harness from the cigarette lighter;
- Remove the handle from the lever;
- Fasteners for the electric fan of the heating system, that is, the stove, also have to be removed;
- Unscrew the bolts fixing the steering column bracket;
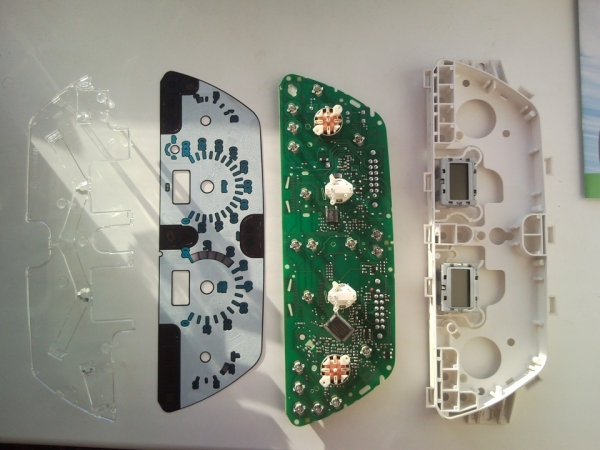
- Dismantle the LEDs, bulb holders and decorative inserts on the panel;
- Unscrew the hydraulic corrector backlight. To do this, you need a key for 21;
- Now it remains to remove the screws from the top and bottom.
Thus, we figured out how to remove the dashboard on your VAZ 2114. Be sure to cover the wiring diagram with something after the measures taken to prevent moisture, dust and all kinds of contaminants from getting there.
Proceed to replace the lamps that turned out to be faulty. At the same time, many are interested in how many bulbs are in the VAZ 2114 dashboard. There are 13 of them, but only 8 can be replaced. Do not forget to clean the contacts if they have signs of oxidation. In some cases, it is necessary to change not the lamp itself, but the cartridge for it.
Choice of light bulbs
Today, the market offers an extensive range of lamps that can be used for the VAZ 2114 dashboard. Among the most well-proven devices, we note a few. Their name and cost are presented in the table.
Backlight Replacement
To improve the quality of your dashboard backlight, it is advisable to install new LEDs in place of the old ones. They provide an excellent glow, consume a minimum of energy, and guarantee a high level of data reading.
- Buy a set of LED lamps, having previously calculated the number of devices needed for each sensor.
- Having removed the block, install the resistances and lamps in the places specially designated for this on the VAZ 2114 - in the cartridges. To dismantle the cartridges, they are carefully unscrewed counterclockwise. In their place, new cartridges are installed, light bulbs are inserted. Respect the polarity and position the LED heads. They will need to be sharpened carefully.
- Connect the power and check how the new backlight works.
- Perform a reverse step-by-step assembly. Be sure to bring the wiring to the board and carefully fix it on it. So the backlight components will not interfere with the reassembly process.
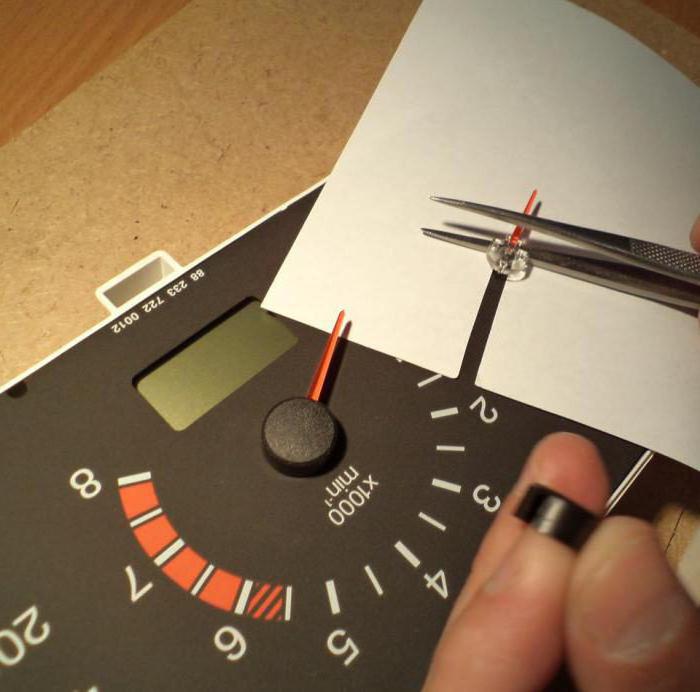
- Watch for the correct location of the arrows on the dashboard. When you try to quickly complete the work, they are often deformed, bent.
- The design of the backlight is fixed with screws.
- The power for the LEDs is connected to the power of the light bulbs, the arrows are put on and set to zero.
- By using on-board computer check the operation of each sensor and instrument. If the identifiers are functioning correctly, return the dashboard to its original state. That is, assemble the entire assembly.
Burnt out light bulbs on the dashboard are unpleasant. Without them, the driver cannot get all the necessary information about the condition of his car. The dashboard on the VAZ 2114 has never been reliable, so sooner or later the owner of this car will have to change one or more bulbs in the tidy. About what manipulations you will need to do with your own hands for replacement, we will describe below.
Reason for replacement
It is obvious: the light bulb in the dashboard is changed when it burns out. This can happen both due to a sudden power surge, and due to the expiration of the bulb.
How to replace burnt out bulbs in the instrument panel
Initially, the VAZ 2114 dashboard has conventional 12-volt incandescent bulbs, so any of them can be replaced with a new one. This is the cheapest option, although not the most durable. For this reason, many motorists prefer to replace incandescent bulbs with LEDs. Sho-Me brand LEDs are the most popular. Colors: blue, red and white. Produced in Korea. If it was decided to install traditional incandescent lamps, then the choice of car owners usually falls on the products of Philips and Osram.
Tools and Consumables
- A set of new bulbs for the dashboard.
- Phillips screwdriver with extension nozzle.
- Screwdriver with a flat sting, medium size.
- Pliers.
How to change on the dashboard VAZ 2114
- The cab opens, the wire going to the cigarette lighter is turned off.
- Using a Phillips screwdriver, unscrew the 3 screws holding the side panel. In addition to self-tapping screws from below (near the floor), it is held by a plastic latch, which is gently folded over, after which the panel is removed.
Self-tapping screws are unscrewed, the side panel is removed
- Now the second side panel is removed (the one to the right of the radio). It is attached with 5 screws. They are unscrewed with a Phillips screwdriver, then the panel is removed.
- Under the removed panels (to the left and right of the radio) there are 2 self-tapping screws that hold both the dashboard and the radio. These screws are unscrewed.
The screws holding the radio and panel are unscrewed
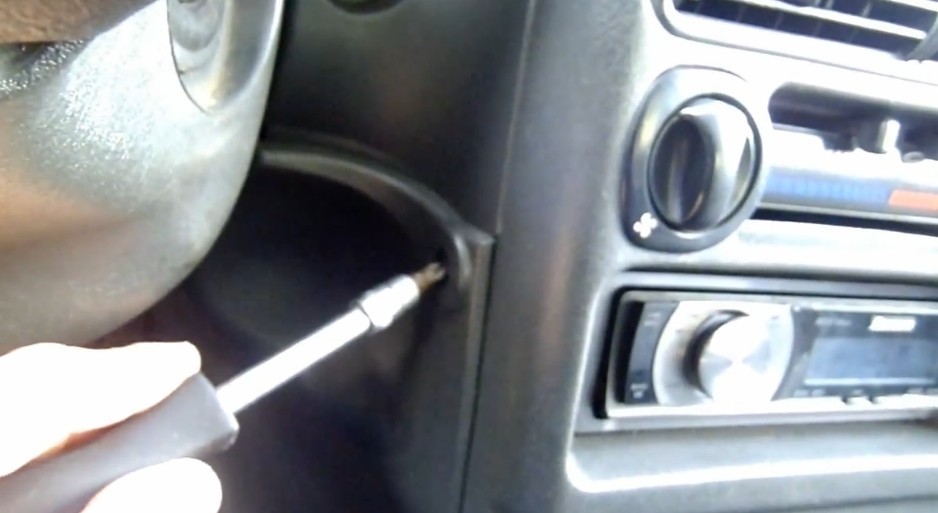
- In the upper right corner of the panel, above the radio, there is a small plug. It is carefully pry off with a flat screwdriver and removed from the socket. Under it is a self-tapping screw. It is unscrewed with a Phillips screwdriver.
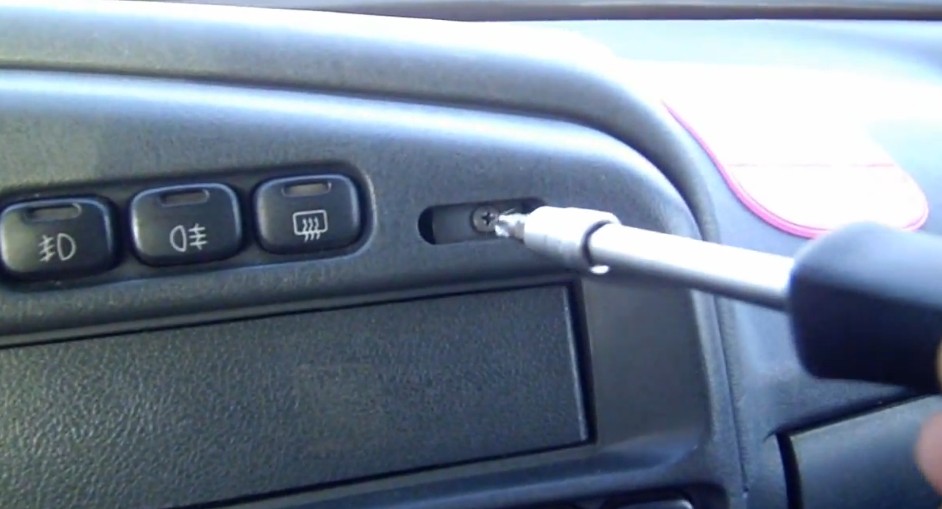
This screw is under the plug.
- Now the stove fan controller is manually removed from the front panel. Also remove the tips on the levers throttle valve. You can’t remove them manually, so first they move a little with a flat screwdriver and only after that they are removed by hand.
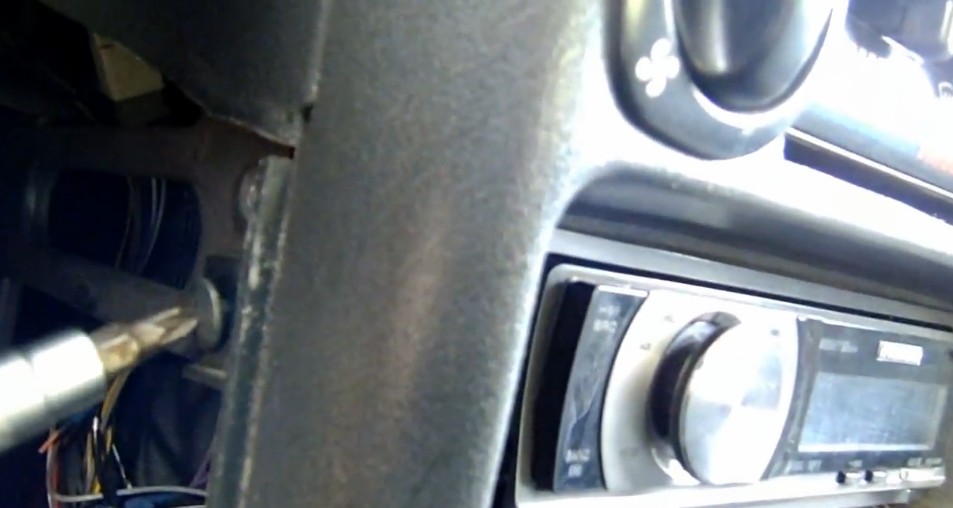
- The steering wheel is lowered as low as possible using the regulator. After that, access to two self-tapping screws located on the visor above the steering column opens. They are unscrewed with a Phillips screwdriver.
- Now a couple more screws are unscrewed, located on the visor above the devices, after which the dashboard is removed.
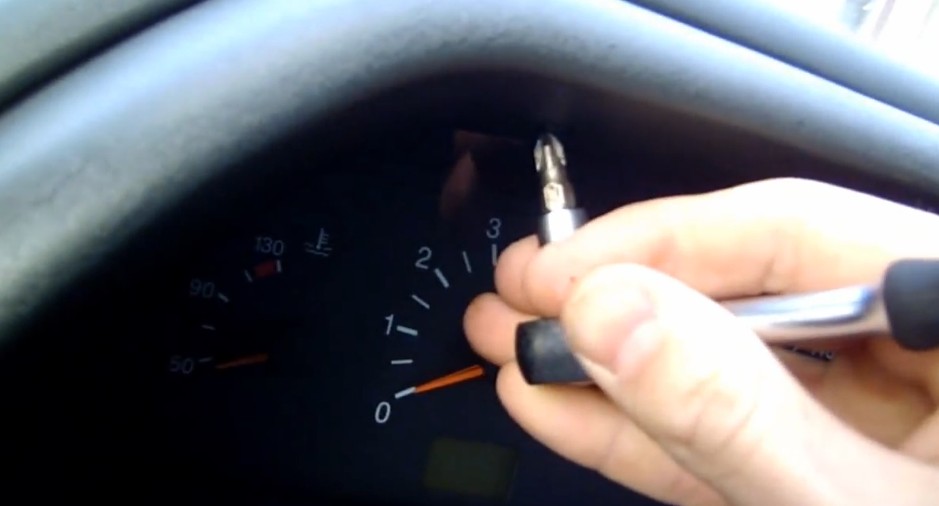
These screws are easier to remove with a ratchet screwdriver.
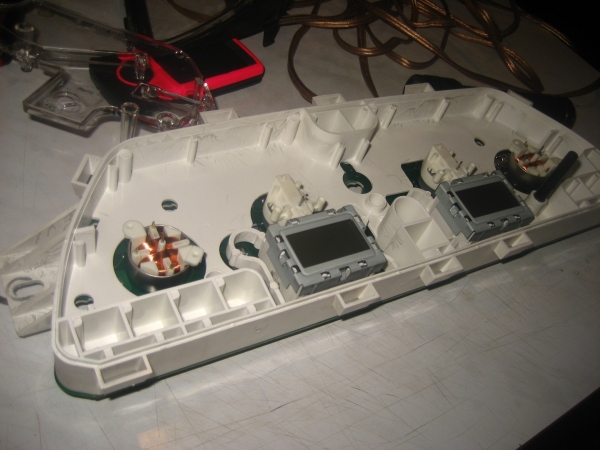
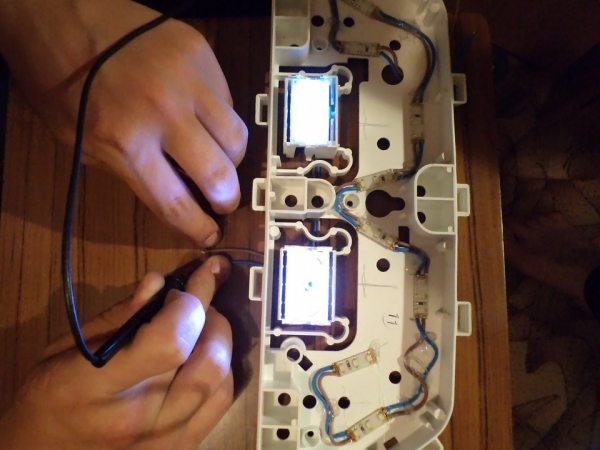
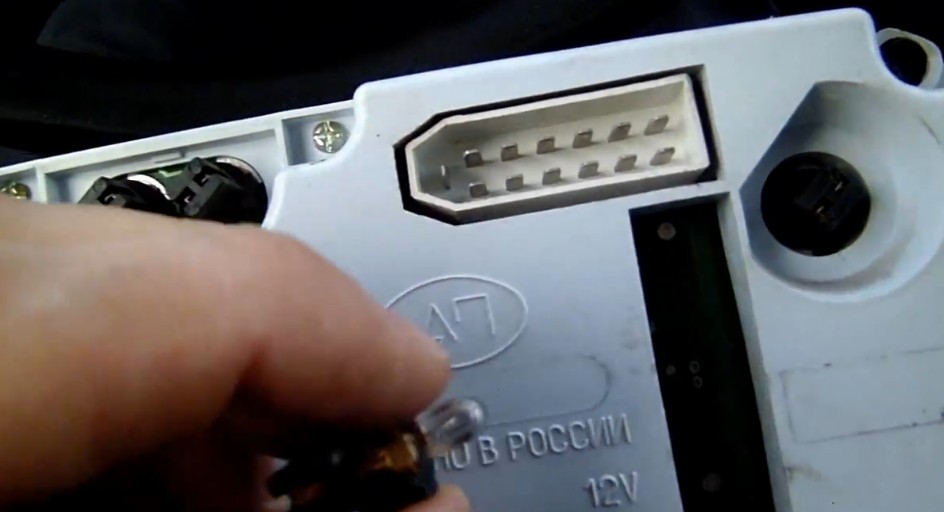
- A long Phillips screwdriver unscrews the screws that hold the block with devices, after which the entire block is removed from the niche, all wires and connectors are disconnected from it.
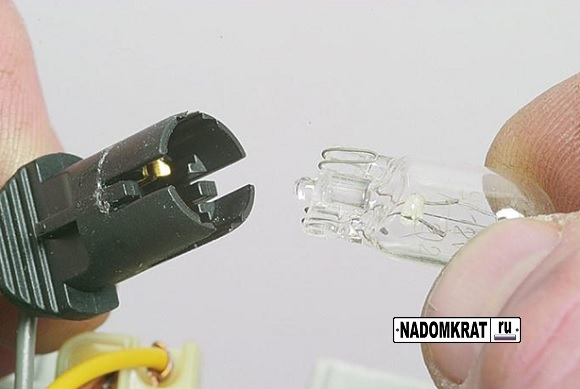
- On the rear surface of the block, next to the connectors for wires, you can see sockets with backlight bulbs. Light bulbs that need to be replaced are carefully unscrewed with pliers and replaced with new ones.
Light bulbs are unscrewed from the block with pliers
- After replacement, the dashboard is reassembled.
Replacement video
Important Points
- When unscrewing the bulbs from the instrument cluster, do not apply too much force. To unscrew the light bulb, you need to turn it counterclockwise by about 90 degrees. After that, a characteristic click will be heard, which means that the mounting antennae have come out of the sockets, and the light bulb can be removed.
- To unscrew the screws from the visor above the steering column, it is best to use a short ratchet for a screwdriver, since there is not enough space there and it will be difficult to unscrew these screws with a long Phillips screwdriver.
- Before disconnecting the wires from the instrument cluster, it makes sense to mark them with a marker so as not to be confused during reassembly.
Changing light bulbs on a VAZ 2114 is easy. But in order to get to them, the car owner will have to remove the entire dashboard, even those parts of it that have nothing to do with the bulbs. Such a " design feature» car can hardly be called convenient, but, unfortunately, there is simply no other way to change the notorious light bulbs.
The dashboard of a VAZ 2114 car helps the driver to control all the necessary status data in a timely manner power unit, the availability of fuel, the time segment of the path, the speed of the vehicle.
It is important to keep the panel in good condition so that the driver can easily see the readings of all the indicators that are located on it. In case of a panel malfunction, emergency situations may occur, as the driver will not be able to control the condition of all vehicle systems, including car signaling equipment, operation brake system, will not be able to take into account engine speed, determine the speed of the car, etc.
The panel also shows the time, temperature, indicates the operation of signal and light lamps. That is why you should always check the serviceability of this device.
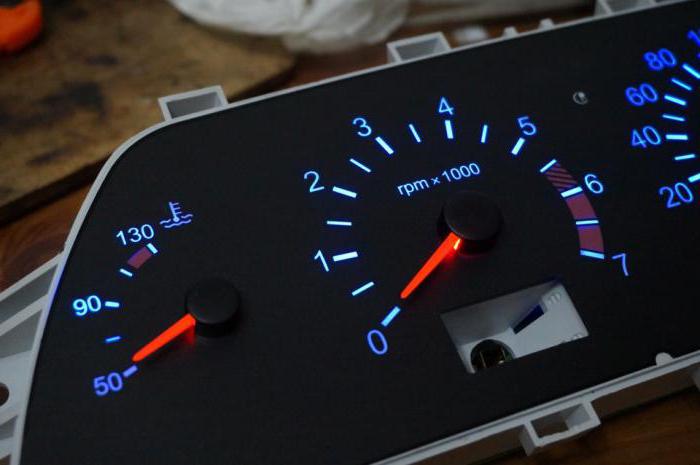
Illumination of the instrument panel VAZ 2114
To the question why the instrument lighting on the VAZ 2114 does not work, many answers can be given. The most common:
- burnout of incandescent lamps or failure of the LED group;
- connector oxidation;
- electrical wiring failure;
- failure of the fuse block;
- damage to the common contact board;
- lack of mass on the body (minus) or damage to the dimensions system.
To troubleshoot, you must use diagnostic equipment, a tester or a voltmeter. If you find a breakdown, you can begin to repair.
Troubleshooting steps
When the instrument panel does not work on the VAZ2114, you need to determine the reasons for its breakdown, if necessary, remove the unit in order to check or replace light bulbs, fuses, or clean the contact board.
To perform this procedure, you will need screwdrivers, curly and plain, two keys for 8 and 21. Next, the following steps are performed:
- 3 self-tapping screws are unscrewed, the lining is removed, the protrusion that is located below, which is removed from the body bracket.
- Now 5 self-tapping screws are unscrewed in the right console lining, the screen is removed.
- After that, the negative terminal is removed from the battery, the wiring harness block is disconnected from the cigarette lighter.
- The handle is removed from the lever. The fastening of the electric fan of the heating unit is disconnected.
- Now we move on to unscrewing the bolts that fix the steering wheel brackets. The light guide, lamp holders, as well as the decorative insert of the panel are removed.
- You can remove the hydraulic corrector backlight with a 21 cm key.
- At the last stage, the screws of the lower and upper rows are unscrewed and the instrument panel is completely removed.
After disconnecting the panel, it is necessary to cover the wiring diagram in order to eliminate the ingress of moisture, debris, dust and other sources of system contamination.
If necessary, the light bulbs in the dashboard of the VAZ 2114 are replaced, the failed ones are replaced with new ones. The presence of oxidized areas that are rubbed with WD-40 liquid is also checked, contacts are processed. If, for example, then the reason for the poor-quality connection of the lamp contacts to the board is the condition of the cartridges for soot, the damaged ones are replaced with new ones.
Replacing bulbs in the dashboard VAZ 2114
If the instrument panel is faulty, and all parts, the backlight, the radio, show high efficiency, then the reason is the fuse box, which must be checked and replaced if necessary.
It is impossible to replace the fuse block with self-made products, or other high-current units, this can damage the electrics, cause serious malfunctions in the system, and lead to a fire in the vehicle. To remove this unit, you need to use special plastic tweezers.
Panel backlight replacement
In order to improve the state of light emission, reduce the wide color variety, it is necessary to place new LEDs in the panel that meet the wishes of the car owner and create optimal conditions for improving the illumination of the device. you can read in our other article.
Before you change the instrument panel backlight on the VAZ 2114, you need to buy a new set of LED lamps and calculate the correct number of diodes for each sensor, for example, for a brake sensor - you need 3 pcs. etc.
After removing the block, the resistance and bulbs in the dashboard of the VAZ 2114 are attached to pre-designated places, cartridges, according to the strict polarity of the location of the LED heads, which are carefully ground. After completion of work, power is supplied and the operability and quality of the backlight are checked.
It is important to carefully control the location of the instrument arrows so that the drives do not bend or deform. The whole structure, the backlight of the VAZ 2114 dashboard is fixed with screws. The power of the LEDs is connected to the lamp, the arrows are put on, a zero indicator is set.
Now you can control all sensors and devices on-board computer. If all control identifiers are normal, the panel returns safely to its regular place.
Main conclusions
When the dashboard on the VAZ 2114 does not light up, it is important to correctly remove the unit, conduct a detailed inspection of the devices, examine them under a magnifying glass, check the condition of the fuse, then check the correct power supply to the panel. After that, ring the backlight tester with a tester and, if the fuses, LED lamps are faulty, replace the faulty unit, according to the sample and technical specifications equipment.
Before replacing the bulbs in the instrument panel of the VAZ 2114, it is necessary to remove the battery terminals, disassemble the decorative trim of the instrument panel and remove the shield. After the troubleshooting work has been done, it is necessary to check the contacts of the devices. To do this, press the reset button and hold for a few seconds, turning on the ignition before this action. When all indication arrows have made control from zero to maximum values, it is assembled correctly and is ready for installation in a regular place.
Each car owner must follow the safety rules when working with the mechanisms of vehicles, correctly adjust the operation of all units in order to avoid breakage and damage to parts. Carry out equipment diagnostics in time, eliminating faulty elements accompanied by qualified support or directly at maintenance points.
During the operation of the VAZ 2114 car, a question may arise regarding the dashboard, especially when the owner of the fourteen decided to do it. In the event of a malfunction, you need to know how to properly remove and install the VAZ 2114 instrument panel. Panel tuning may also be necessary. Each of the operations has its own nuances, which we will consider below.
Difficulties in operating the instrument panel VAZ 2114
During the operation of the car, various malfunctions in the instrument panel may occur. Indicators, on-board computer or system may not work. In this case, you need to check the fuse. He most likely burned out. But for this you need to verify this, check the wiring and replace it. A short circuit can cause this problem.
To improve lighting, in order to become better visible, it will be necessary to disassemble the dashboard and purchase the required number of LEDs. On the disassembled panel, it is necessary to make marks for attaching new diodes. For each device you will need a certain number of them. For example, a temperature sensor may need three bulbs. LEDs and resistances are soldered in places specially designated for them. In this case, it is necessary to observe their polarity and carefully grind the heads.
After all the diodes have been soldered, you need to remove the power and check their operation. If any of the bulbs does not burn, then this means that it is faulty, or the polarity is reversed.
To backlight the LCD display, it is necessary to replace the lamp with the base with a diode and resistance. The same manipulations can be carried out with any indicator and device on the panel.
Assembly of instrument panel lighting VAZ 2114
For assembly, all LED wires must be brought out to connect to the board. Then you need to connect the plexiglass and the body tightly. At the back, this design is connected with screws. The instrument panel of the VAZ 2114 is illuminated through the board. It must be installed, but so carefully so as not to bend the arrows of the instruments, or rather their drives. Everything is fixed with screws. The power supply of the diodes is soldered to the power supply of the lamp. Then the arrows are put on and set to zero.
If necessary, you can correct the readings of instruments and sensors using the on-board computer. A special transparent visor is put on top of the panel. After that, the instrument panel returns to its original place.
How to choose a DVR for a car correctly and inexpensively
Foreign cars up to 600 thousand rubles can please with their efficiency
Tuning VAZ 2112 is simple and stylish
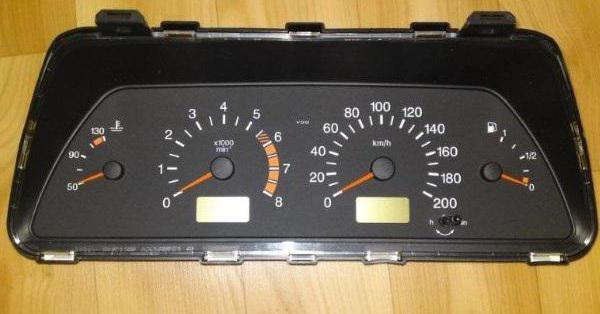
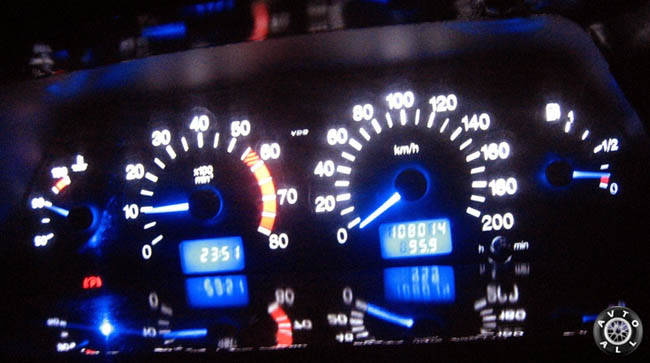
Sitting in the car, the driver in front of him observes a huge number of controls, one of which is the dashboard. It is equipped with a number of important indicators: speedometer, odometer, fuel level, engine temperature, overboard temperature and oil pressure.
The above are the main indicators, and, as a rule, take place on all dashboards of various car brands. Depending on how equipped the car is with various systems that are usually designed to assist the driver in driving, the panels may have additional instruments.
Dashboard. Why is she needed?
On a VAZ 2114 car, the dashboard has all the main controls that ensure comfortable movement and proper driving. It is the main tool in driving a car, which provides all the necessary information to the driver. The panel should be located in a place that will not interfere with control and at the same time provide special information content and be easy to read the sensor readings. Ease of use is the main concern in the production of each panel for all cars of various brands. The main indicators that each dashboard should share with the driver are:
- Data describing the operation of the engine.
- The state of the car and all its systems at a given time, on which the safety of movement depends.
- The expediency and correctness of the use of all units of the car.
- Additional information, which includes: time, travel time, power reserve and others.
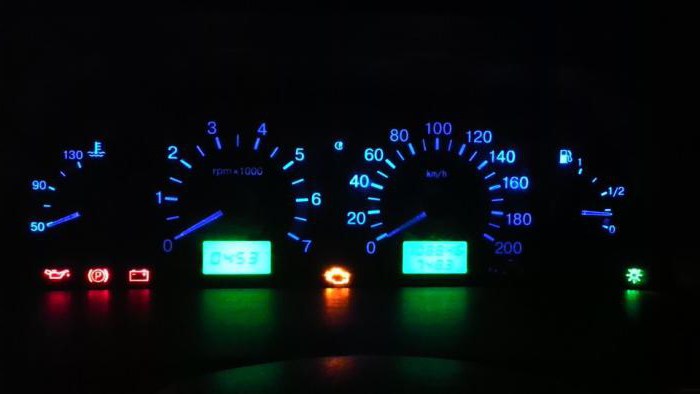
What can break?
On a VAZ 2114 car, the dashboard has several problems that are often found among cars of this brand. Sooner or later, VAZ owners will have to face them. One of these problems is the backlight of the VAZ 2114 dashboard, which eventually stops working, which is not entirely good, given that the tidy is not visible at night. This kind of trouble can become larger, causing an emergency. Replacing the bulbs in the dashboard of the VAZ 2114 will help solve this problem. To fix it, you need to remove the instrument cluster. This can be done in the following way.
How to remove the dashboard?
- The plate that holds the panel is screwed with three self-tapping screws, we unscrew it with a Phillips screwdriver.
- Then there are five self-tapping screws with which the tidy itself is screwed to the car body.
- We disconnect the mass from the battery, if a radio is installed in the car, you should remove its block from the common wiring harness.
- When disconnecting the wiring harness, you should also pull out the cigarette lighter socket and the ashtray light wire.
- We remove the handles from the levers, with a flat screwdriver it will be easier to do this.
- Pulling it towards you, remove the handle of the heater electric fan.
- From above and below the instrument cluster, unscrew the screws (two above, two below it).
- We unscrew the screws that are behind it.
- The cover plate is held by two self-tapping screws, remove them.
- We remove the cover.
- For convenience, it is worth marking the wires that we disconnect so as not to confuse them during assembly.
- Next, unscrew the steering column bracket using an 8 mm head.
- Using a Phillips screwdriver, remove the LED.
- We remove the screws with which the heater control unit is held.
- After removing the external parts, the decorative insert should be removed.
- Next, unscrew the nuts with a 21 mm wrench.
- We unscrew the screws in the places of attachment of the tidy.
- Delete the panel.
Thus, on a VAZ 2114 car, the dashboard is removed from its place and, if you need to return it back, you should perform all these steps in reverse order.
After dismantling, you can begin to repair. And if the VAZ 2114 dashboard does not work for you, this method is also suitable for removing and installing a new panel in place of the old one. It's not difficult at all. And replacing the dashboard of the VAZ 2114 will no longer cause you fear.
How to improve the dashboard?
In any car of the domestic auto industry, the instrument panel is not the most beautiful visually, and almost all motorists are ready to improve it by any means. appearance. In addition, this is the first element of your favorite car that catches your eye all the time.
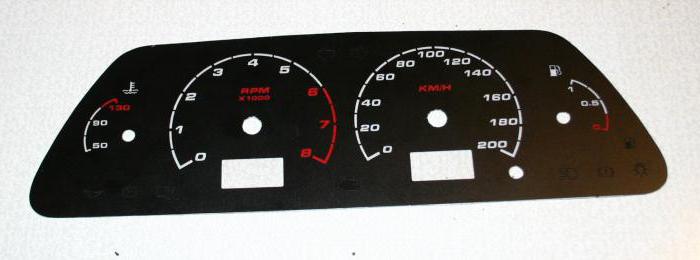
There are a lot of variations for its modernization. The most important thing is to know what the driver wants, and to fulfill this is not difficult for both the owner himself and the master in the field of electronics. The simplest upgrade and at the same time the most popular is the replacement of light bulbs. This allows you to breathe new life into your dashboard, make it unique and unlike others. In addition to light bulbs, you can also change the tidy pattern. There are a wide range of different background options available in car dealerships to suit every taste.
Why change light bulbs
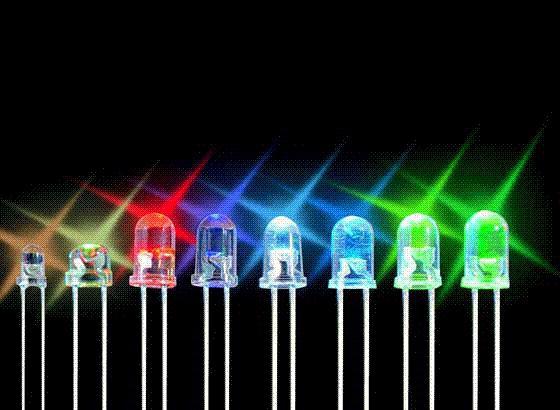
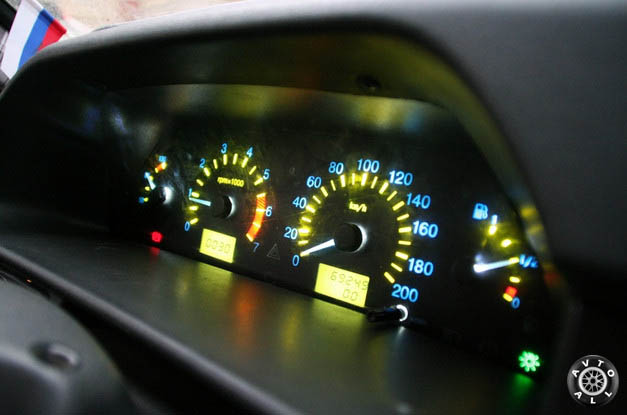
Replacing light bulbs in the dashboard of the VAZ 2114 among motorists is called tuning. This modification creates a special comfort and adds aesthetics to the interior of the car. To replace the light bulbs, you do not need to completely remove the old panel, it is enough to remove the protective glass, after which it will be possible to change both the backlight and the pointer arrows on the entire tidy. Bulbs in the dashboard of the VAZ 2114 can be purchased in almost all stores that specialize in spare parts for the domestic auto industry.
There is a fairly large selection of colors. Diode bulbs are popular among buyers, they shine much brighter, which allows you to better see the sensors on the VAZ 2114 dashboard at night. Installing this update is not as difficult as everyone thinks. Many people think that they will have to work with a soldering iron and are afraid to completely ruin the device, thereby forking out for a larger amount. Upgrading will require preparation of the material to be installed and a minimum number of tools.
3 steps to change the bulbs in the dashboard
- We dismantle the instrument panel and remove the protective glass from it.
- Carefully remove the speedometer, tachometer, fuel level and temperature indicators.
- Then we change the overlay that was purchased and put the diodes of the color you need.
Here, motorists are given complete freedom of action, and each of them can choose something individual for themselves. You can insert calm tones so as not to strain the eyes of the driver, or you can stand out and put bright, but at the same time aesthetic diodes. Everyone chooses how his car will look like. And, as a rule, the panel turns out to be more than successful and it becomes very pleasant for the eye to look at it.
Can I do it myself?
Many people think that this modification of the tidy is too complicated, but it is not. There is absolutely nothing complicated, everything is simple and everyone can do it. This job does not require any special equipment, just a couple of screwdrivers, pliers, free time and, of course, patience. Where do without him.
If you are still afraid to perform these replacement actions, and you cannot do without a beautiful, shining new dashboard, then you should contact a service where everything will be done to you efficiently and at the same time inexpensively. This operation is not at all expensive and harmless for the operation of sensors. Who would have thought that such a budget upgrade could bring so much pleasure to motorists. On a VAZ 2114 car, the dashboard begins to play with new colors and bring great pleasure from driving a car. After installing new diodes, few people speak badly about the new panel. At the same time, many advise each owner to make an appropriate replacement. After all, this is perhaps the easiest and affordable way upgrade your car.
What about arrows?
Another subject of refinement in the instrument panel are the arrows. It became popular to make them luminous. This change will also require the removal and disassembly of the panel as described above. Then, under each arrow, carefully place a diode of the color that your arrows should glow with. We bring the power wires of the diodes outside the tidy and connect them to the wiring of the cigarette lighter or heater. After that, you can assemble the dashboard by doing all the steps in reverse order. Now you can enjoy the updated interior!
Related Articles