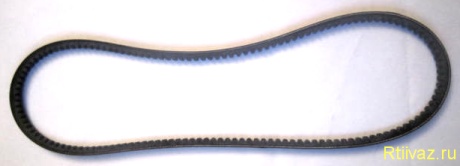
Alternator belt size for Zhiguli 2193. What should be the length of the alternator belt
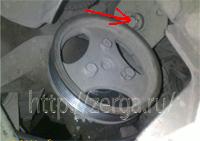
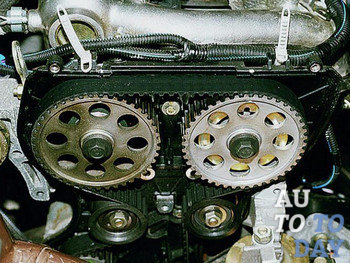
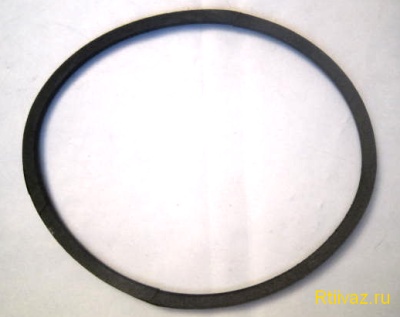
Left VBF is old, Right VBF is new (find 4 differences besides dirt =))
Well, now the fun part. My Priorka with PANASONIC air conditioning (how did I find out which company the condo was? Very simple, here is the link, everything is detailed there, for which respect and respect to the author).
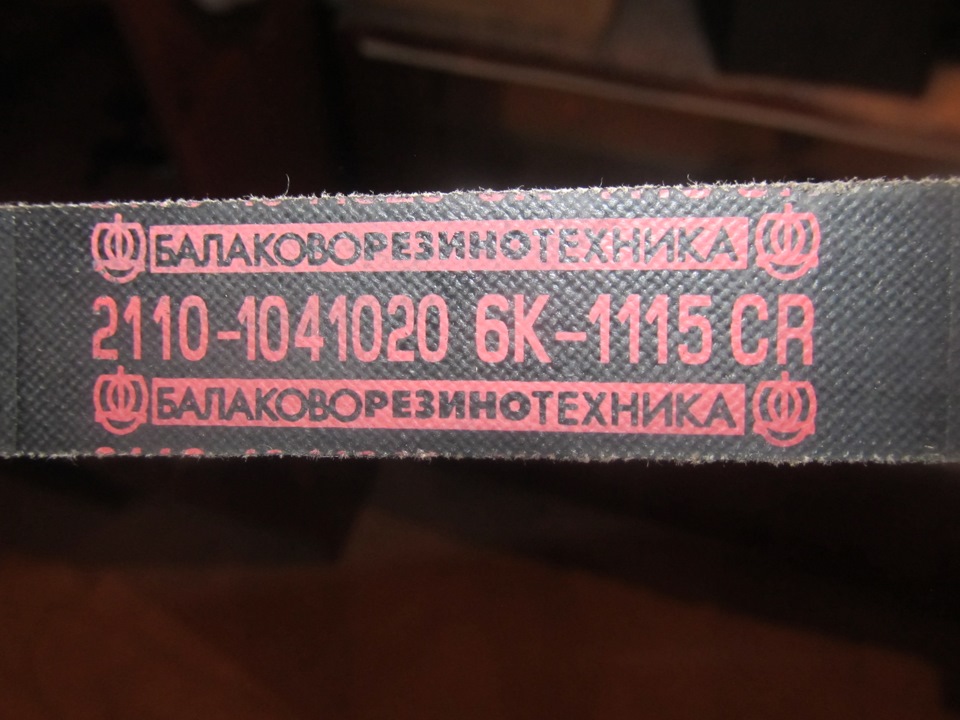
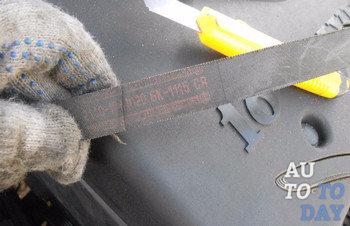
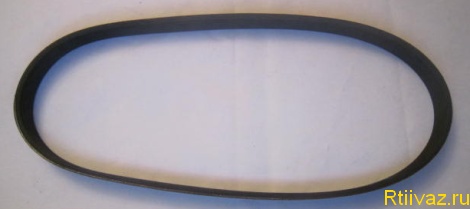
Well, this is half the trouble. The main question is, HOW LONG SHOULD THE BELT BE? And then it started, who writes 1115 who writes 1113 who 1118 and who 1125 (you will be just surprised by my little discovery, but let's say sweet for later).
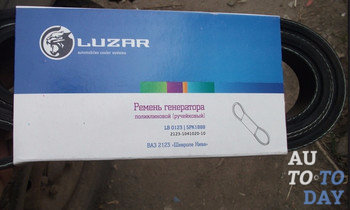
Without hesitation, I took off my alternator belt and went to the store with it. There were no inscriptions left on it, I had to pull it in place with a new belt and check the likelihood of a match. TOTAL, 1115 as shown by the sample was a little small, 1125 was a little big. Based on what I read on the internet (they say that some long belts squish and turn when the tension roller is fully tensioned), the choice fell on the advice of the sellers (and one of them also had a prior with kondey and he put 1113) on 1115 of the BRT company (BalakovoRezinoTekhnika)
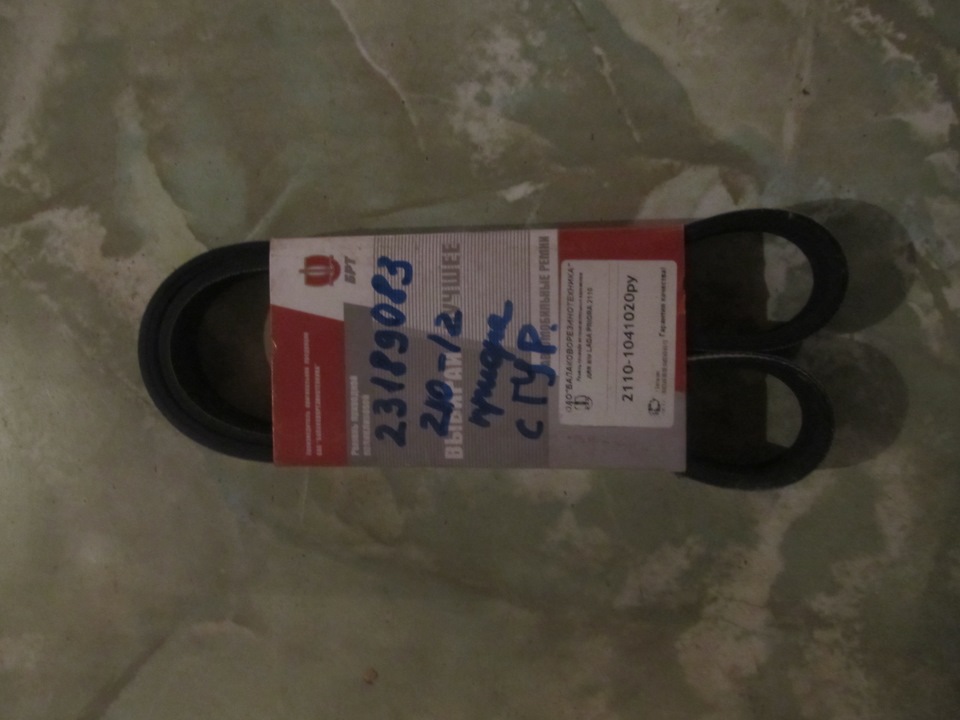
In general, here it is, it is written that for the gur.
I happily returned home and started the installation. In general, guys, I will describe the easiest, in my opinion, method for installing the alternator belt on a prior with air conditioning (P.S. we removed the tension roller before all the steps listed below).
To begin with, we unscrew the mud protection pad (it crawls a little under the wheel liner), and the wheel can simply be turned to the right side, I think it will not be difficult for you to remove it (I think 3 self-tapping screws are already visible and 1 is hidden under the wheel liner) and pull it out
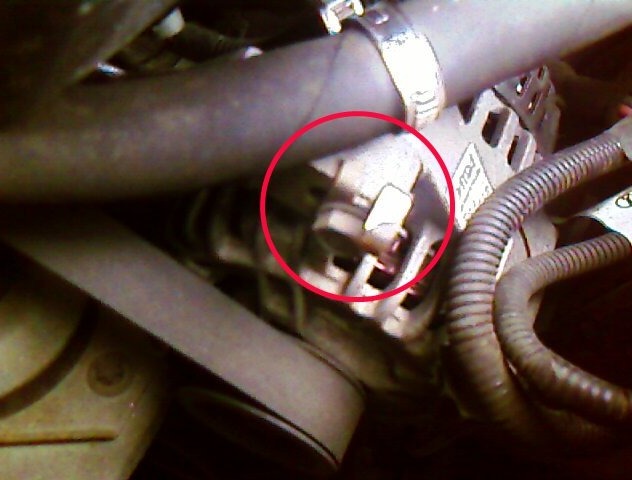
We turn off only TWO bolts of fastening of the right pillow
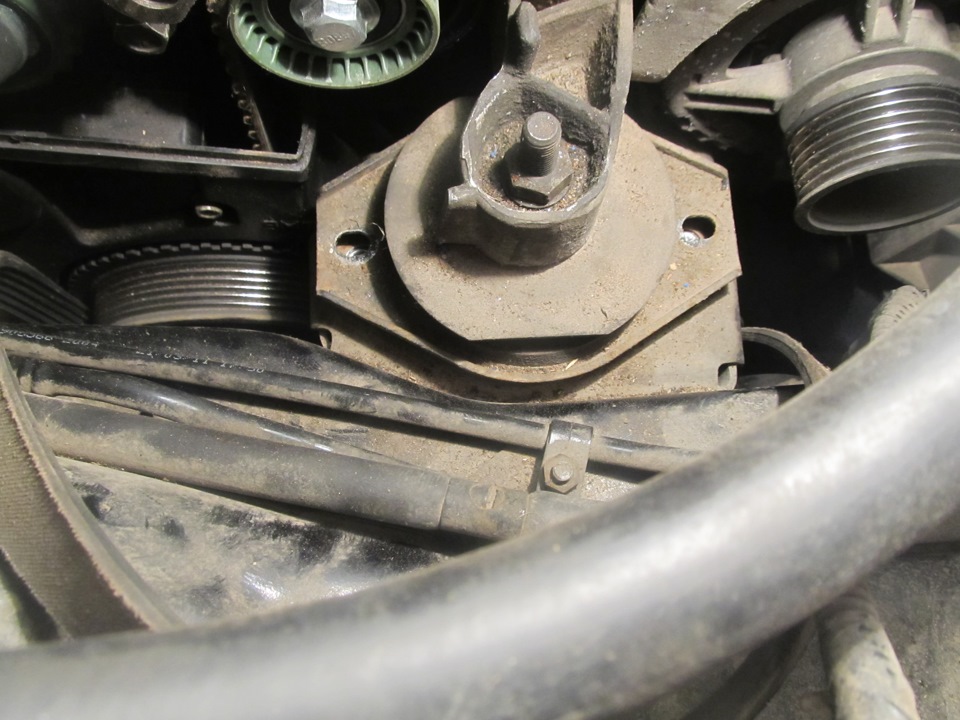
We do not need to unscrew the bracket bolt (located in the middle). Extra headache.
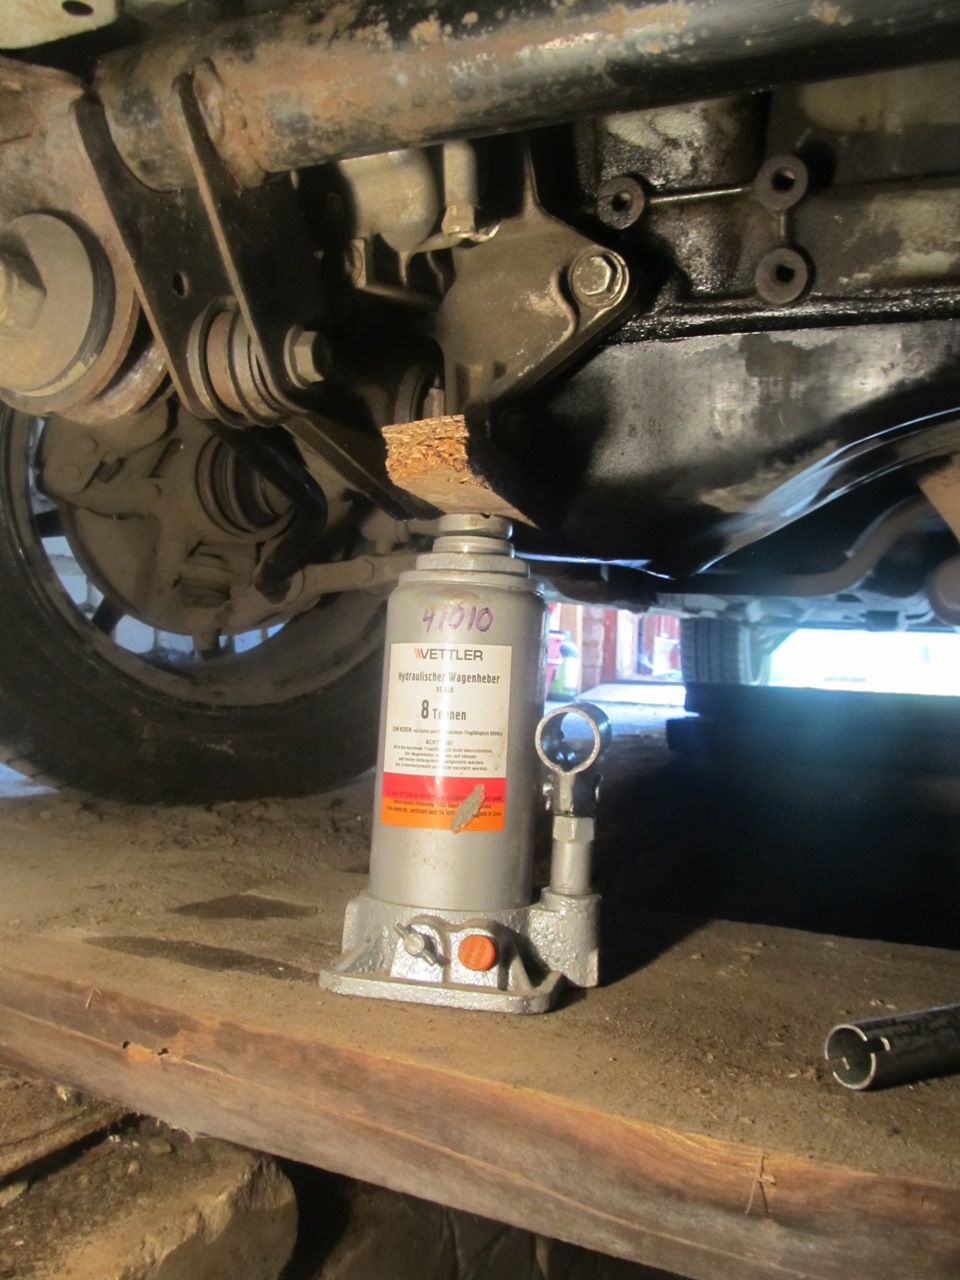
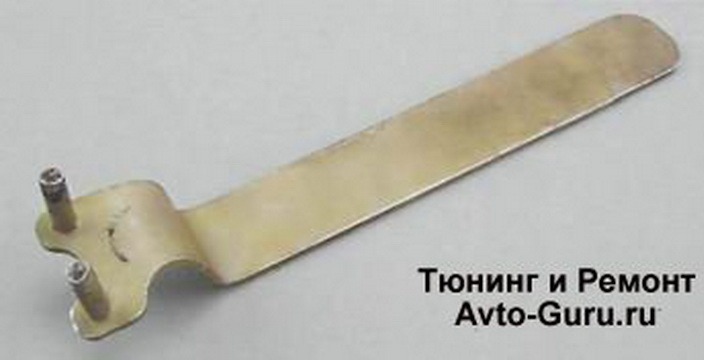
Then we put the jack under the bracket of the lower guitar (in my opinion, that's what it's called), do not forget to put a plank
Something like that
And jack up the engine
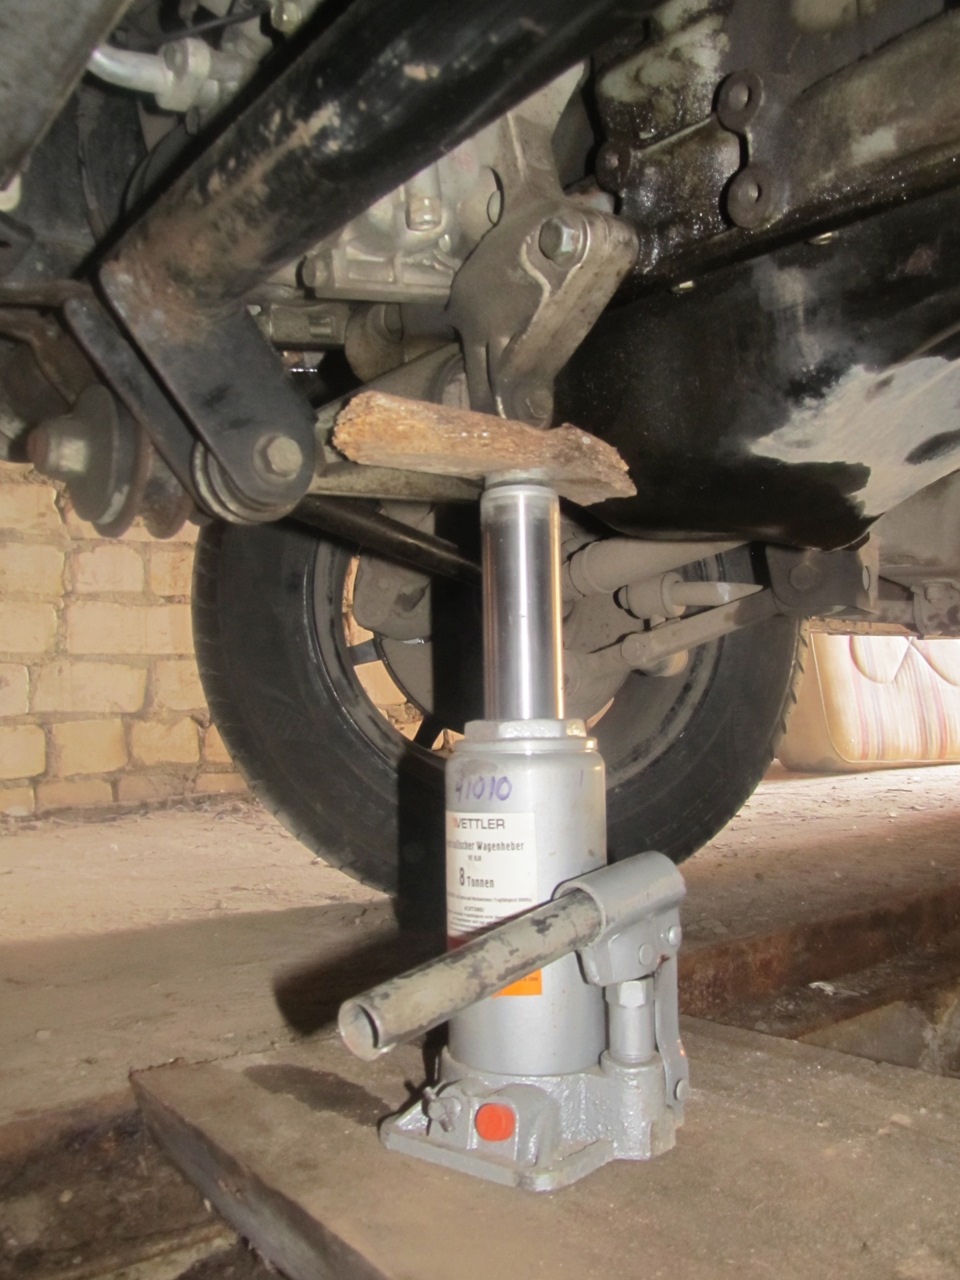
We are without fanaticism
Further into the gap formed,
we push the old belt iiiiiii it cannot crawl through to the end (the fact is that the raised engine leaves a very small exit, between the pulley crankshaft and a pillow support that stays in place). Everything is treated very simply, it is enough to bleed the jack a little and the gap will immediately increase. And of course, now you can slip the belt very easily. Well, and now we install a new belt in the reverse order (put it in, jacked it up, put it in, lowered it, twisted it, pulled it) Something like this =)
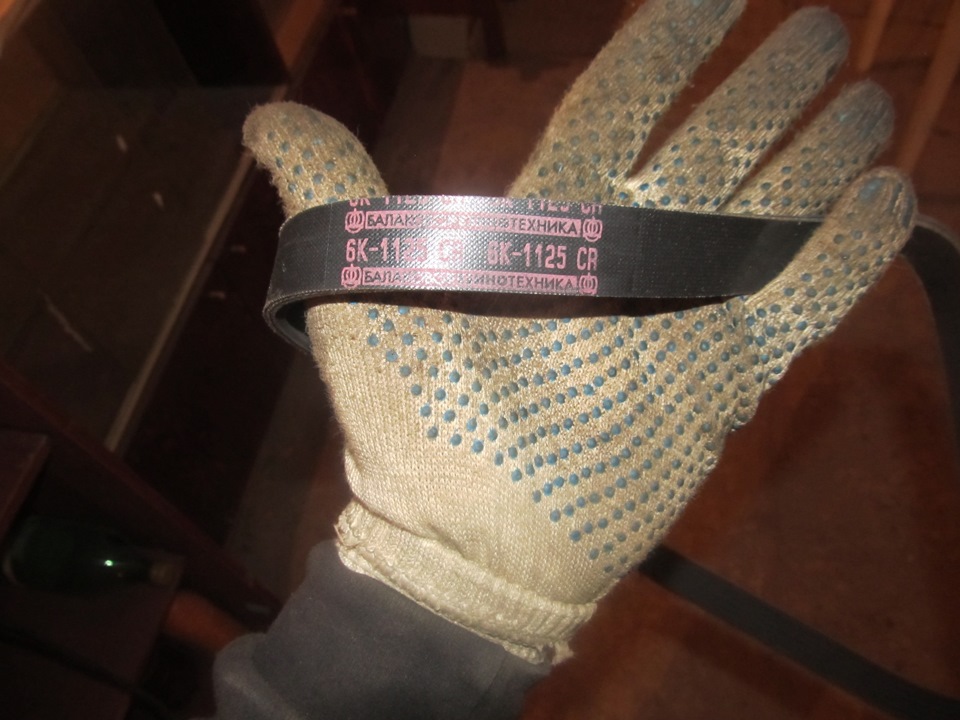
I will continue my story. And here, after all my machinations, it turns out that the belt is 1115 long,
Here he is born
I’m not just pulling it, I can’t even put the tension pulley in.
My surprise knew no bounds. and despite the fact that I went to the store with an old belt. In general, I had to go again (since the 1115 belt was in good condition) and buy 1125.
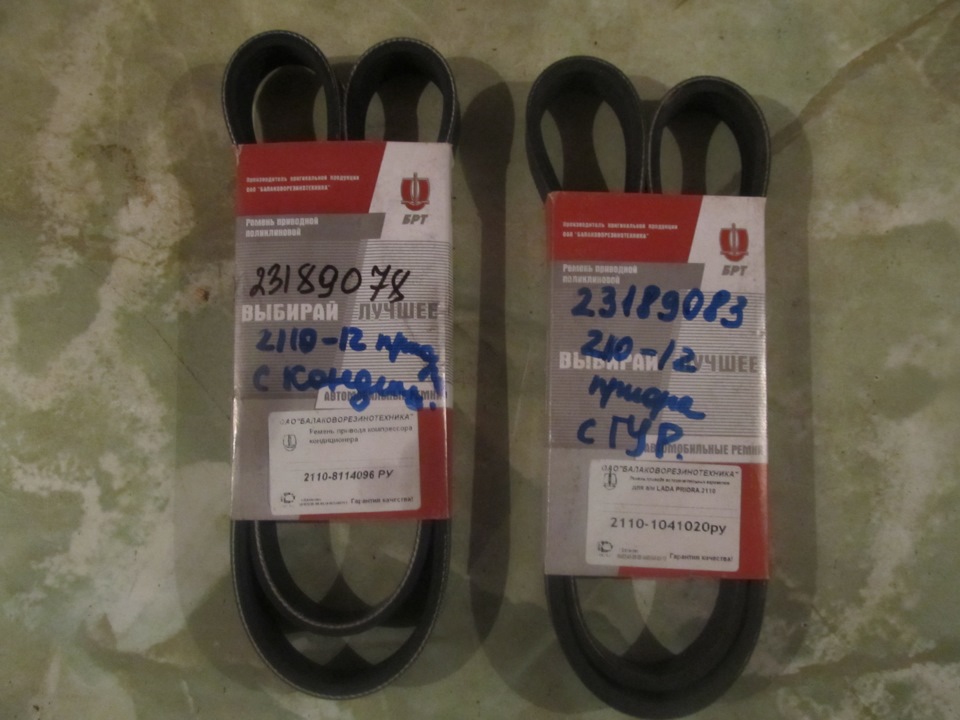
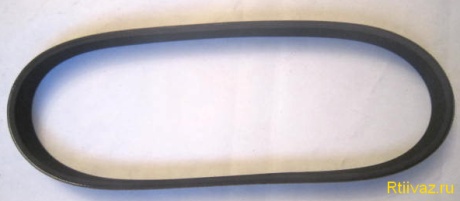
Here they are both from the same company BRT (BalakovoRezinoTechnika)
And as you understand, 1125 came up just in time
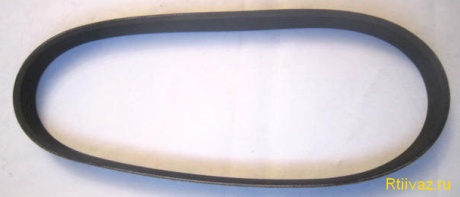
Here it is salvation
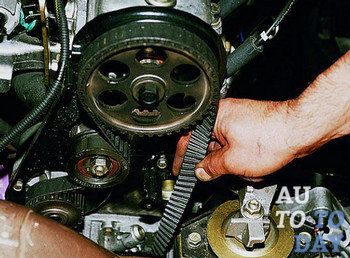
Next, insert the belt guides into the grooves of the pulleys and pull the roller. Moreover, we stupidly check the tension by pressing on the gap between the roller and the generator pulley (about half a thumbnail, according to the Internet video).
As a result, nothing whistles or buzzes anywhere, everything works smoothly. You can hear the work of the roller and the belt itself (unfortunately, there is no escape from this).
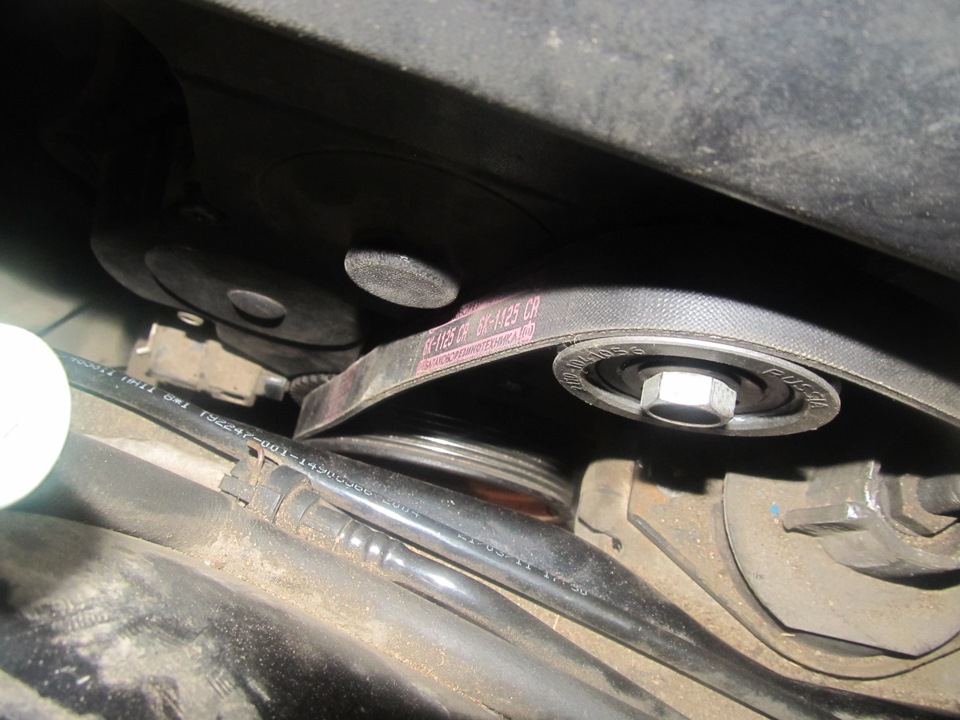
Installed but not tightened yet. The inscriptions are readable and not upside down towards the motor. All feng shui.
But one question, it just didn’t leave me alone, WHY THE LENGTH OF THE BELT IS DIFFERENT FOR EVERYONE, with the same kondeya? As a result, from the self-instruction book I bought on prior, I came to one very interesting discovery.
It turns out that the generator itself, by loosening the mounting bolts, can be easily moved towards the tension roller (this is proved by the rather wide loops in which the generator mounting bolts are located). It turns out (of course, I didn’t check it myself, and I don’t need anything already), that in my case, a belt with a length of 1115 can also suit me, I move the generator a little closer to the tension roller.
This guess is not 100% reliable, since I have not yet had time to check it, but I don’t see another explanation for the different lengths of the belt on machines that are absolutely similar in design.
My opinion, I repeat, purely my opinion, not so hot, but I didn’t find anything really explaining, regarding the length of the belt, on the Internet. Ask, I will answer what is not clear to anyone, criticize, it is your right.
Well, I just have to say.
Auf Wiedersehen
I welcome you dear visitors of the site site. If you are on this page, then you are interested in information on how the VAZ 2110 alternator belt is replaced.
Be 100% sure that you have come to the right place. A detailed illustrated guide for belt replacement is provided here. This article is not limited to the VAZ 2110 model, but fully covers the entire tenth family, taking into account Priora and Kalina.
I will list the main points that will be discussed in this guide.
Why is the alternator belt whistling.
What are the dimensions of the VAZ 2110-2115 generator belts.
Replacing the alternator belt VAZ 2110.
How to tighten the VAZ 2110 alternator belt.
Using this guide, you will do all the work yourself without much effort. Believe me, there is nothing difficult.
The VAZ 2110 alternator belt whistles, why?
Why is the belt whistling? There are several reasons: weak tension, moisture got into the V-belt connection (very rarely), drying out (destruction), and the wedge of the generator flowed.
All of the above points can provoke a belt whistle.
Let's take a closer look at each of the reasons.
With a weak belt tension, slippage occurs in the V-belt connection, this is especially noticeable when the car is operated at night, when the lights are on. The generator produces more power, which means that the load on the V-belt connection (belt, pulley) increases. From slipping and a whistle appears.
Cars with installed power steering or air conditioning are very affected by this phenomenon. This is described in detail below in the belt tensioning paragraph.
The ingress of moisture often does not lead to a whistle, but rather to slipping of the belt. When slipping, moisture evaporates from heating and may whistle a little. This indicates that the belt needs to be tightened.
The drying of the belt means that destruction is underway. Cracks, scuffs appear on the belt, and pieces may even fall off, all these signs show that it is urgent to change the belt.
Dimensions of the alternator belt VAZ 2110-215, Kalina, Priora
There are too many sizes of alternator belts, it seems that they made a separate belt for a specific model, but there are several sizes that are most commonly used and fit all models of the tenth family.
Let's start with perhaps general model wide multi-ribbed belt, which was installed on standard VAZ models and the first generators:
VAZ 2108 - VAZ 2115 size - 698 mm.
Models without hydraulic power steering and air conditioning:
VAZ 2110 - VAZ 2112 size - 742 mm.
Without hydraulic power steering and air conditioning Size - 882 mm.
With air conditioning, the size is 1005 mm.
VAZ 2110 - VAZ 2112, as well as VAZ 1118 (Kalina), VAZ 2170 (Priora) with hydraulic power steering:
Size 1115 mm.
VAZ 2110 with air conditioning:
Size 1125 mm.
These are the most basic sizes that will definitely fit a particular brand.
Replacing the alternator belt VAZ 2110
What we need to replace: a good set of tools, a jack (to raise the engine) and a new belt.
Before starting work, it is advisable to treat all threaded connections on the tensioner with WD-40 liquid so that everything becomes sour, otherwise it is possible to break the bolts.
Loosen the alternator belt. The complete process of removing the tensioner is described in the article “Replacing the VAZ 2110 generator”, I recommend that you read it. After you loosen the belt, it can be easily removed from the alternator pulley, but to pull it out completely, you need to remove the right boot on the car body.
By removing the protective boot, you can easily pull out the worn alternator belt.
Having bought in advance right size belt, install it back. If you are standing near the right fender of the car, then the letters and numbers on the belt should be read from your side, and not upside down.
It remains only to tighten the belt and assemble everything back, but it will be a little lower, and now we will carry out a replacement on VAZ cars with power steering or air conditioning.
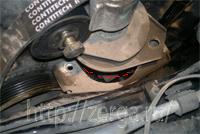
As it turned out, everything is not so simple here. When installing a power steering or an air conditioner on a power steering engine, the generator was moved up a little and in order to replace the belt, it must be passed through an additional engine support.
Why they did this is not clear, but the work has increased.
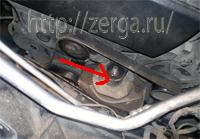
Here the replacement process is almost the same, but you need to tinker near the additional engine support.
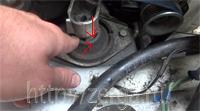
We need to unscrew and pull out the central support bolt, then raise the engine a little and thread the belt into the gap between the pillow and the engine support. This method is suitable for models with installed air conditioner, but if power steering is installed, then the bolt will not come out completely and will rest against the pulley.
To pull out the bolt, you need to remove the pulley or completely unscrew the cushion of the additional support. By slightly jacking up the engine and turning the pillow, you can stretch a new belt.
I don’t know which is easier, removing the pulley or unscrewing the support, both methods are very inconvenient, so the choice is yours.
Let's go back a little to the first option, if air conditioning is installed.
You can tinker and completely unscrew the support cushion, or you can completely unscrew only the central bolt.
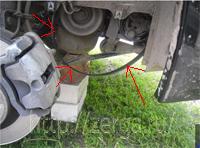
We install a mechanical support under the car body.
Now we need to place a jack under the engine and raise it a little. The photo below shows where to place the jack, and don't forget to put a block of wood under it to prevent the oil pan from deforming.
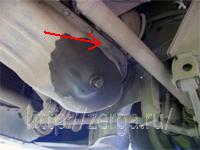
The engine should not be lifted much, because you can break off the exhaust manifold, which is rigidly fixed or other mechanisms. You don't have to lift much to get the belt through.
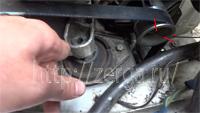
When you put the belt on, be careful, a fixing washer is installed on top of the pillow, do not lose it.
After stretching the belt, install the bolt back and lower the engine. Install the side boot and wheel. Now it's a stretch.
How to tighten the alternator belt on a VAZ 2110?
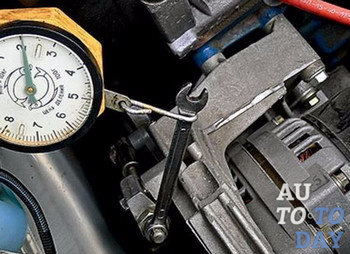
The adjustment is very simple. With a key of 10, tighten the bolt on the tensioner until, when you press the belt between the pulleys with your fingers, the deflection is approximately 6 - 10 mm. The pressing force is not great. If you have a special measuring ruler, then with a force of 10 kgf, the deflection should be within 10 - 15 mm.
On VAZ vehicles with installed power steering or air conditioning, the tension should be a little more. When pressed with your fingers, the belt should sag by 5 mm. All this is done so that no matter how the belt slips, because the contact area between the belt and the pulley is not large.
But you need to remember that it is also impossible to overtighten, because the generator bearings will quickly fail. Here is such a design with a surprise.
On this, perhaps, everything. We have replaced the VAZ 2110 alternator belt.
Until new posts.
Generator car engine unable to properly perform the tasks assigned to him if a belt of the wrong length is installed on him. If it is too long initially, or if its length increases during operation, this can lead to a number of very unpleasant consequences. Naturally, no one wants to deal with engine repairs, for this reason it is very important to immediately install the belt of the correct length or adjust its tension in time. You can find out exactly what size of the alternator belt you need from the car's instruction manual. How to pull it in case of sagging, we will describe in the article below.
1. Correct alternator belt length
The role of the alternator belt in the functioning of the car as a whole is quite high. Thanks to him, the torque is transmitted from the crankshaft to the generator shaft, as a result of which electrical energy is generated to power the most important components of the car. In this regard, the alternator belt must always be in good condition and have dimensions that fully comply with the requirements of the device itself. In particular, at the moment when the alternator belt breaks, the car simply stalls and can no longer continue its movement.
The belt itself is a rubber product, which is a vicious circle. Due to the importance of this element, its condition must be constantly monitored by adjusting the tension force, as well as replacing it if such an operation becomes necessary. You can evaluate the reliability of the belt when choosing it for your car by several parameters at once:
1. Profile.
2. Width.
3. Thickness.
4. Length.
In addition, today there are three types of belts that are installed on generators:
1. Serrated.
2. Wedge.
3. Polyclinic.
 You can find out which belt according to all the above parameters should be installed on your car from its personal instructions. If, for some reason, it has been lost, today you can easily go to the official website of the manufacturer and read similar instructions on the Internet. For example, if we are talking about a car Russian production VAZ-2106, then for this model it is required to select belts with the following parameters:
- width - 1 cm;
Length - 94.4 cm;
Wedge angle - 39º.
In this case, it will be as easy as possible for you to install and adjust the belt, since it will ideally fit the knot for which it is intended. At the same time, it is very important to buy original products that are of the highest quality and reliability. The fact is that the length of the alternator belt is one of the main indicators on which the overall performance of the device depends. And even if at the time of purchase you choose a belt of the right length, during operation a low-quality product can stretch significantly, thereby reducing the power of the generator.
 At the same time, one should not forget that it is consumable. Therefore, it is not worth pulling it up too often and trying to prolong life with various additional means. According to the instructions of most manufacturers, the alternator belt must be replaced after every 15,000 kilometers. But if its length exceeds the allowable rate, it should be done more often.
2. Long alternator belt: what consequences can this lead to?
If the generator is not functioning properly, this can be recognized by the characteristic sound. In particular, if a too long belt is installed on it, or if this element simply stretches and begins to sag from intensive use, then when you turn on a large number of electrical appliances in the car, you will hear a very unpleasant whistle. It arises due to a weak tension and the fact that the alternator belt can simply slip on the pulleys.
Undoubtedly, the stretching of the belt will also affect the operation of the electrical appliances themselves:
1. In the voltage of the electrical circuit of the car, alternating drops can occur.
2. Instruments and headlights give a very dim light, which is not even enough to fully illuminate the roadway.
3. The instrument panel may display a red light to notify you that there is a problem with the battery.
It is not worth neglecting such a phenomenon. As a result of belt stretching and improper functioning of the alternator, a car battery may fail. Therefore, if you purchased a belt that is too long for installation on a generator and do not see the need for tensioning it, you should think about the real danger that you can provoke with such a decision. But at the same time, you should not overdo it with the tension force. If the product is too tight, the alternator bearings may fail.
3. How to tighten the alternator belt on your own?
 We do not think it would be superfluous to once again emphasize that the tension force of the alternator belt should be optimal. If you press it with a force of several kilograms, its maximum deflection should be only a few millimeters. The maximum allowable value is 1 cm, and then only for a certain type of generator, indicated by the numbers 9402 or 3701.
It is not difficult to tension the alternator belt on your own in case of sagging, the main thing is to know how to do it correctly. You should immediately prepare the set of tools necessary for work: two open-end wrenches for 17 and 19. At the same time, you don’t even have to spend too much time on this procedure; on average, it will take about half an hour to work. It is only worth noting that for each type of generator, these works will be carried out in their own way, so, focusing on our instructions, still be attentive to the features of the generator installed on your car. There are two ways to carry out the process of tensioning the alternator belt. We will tell you about each of them.
Features of tensioning the alternator belt using an adjusting bar
This tensioning method is not suitable for all cars; it is best to apply it to the VAZ classic. Using the adjustment bar makes the work process very easy, so this method is best for doing this procedure at home.
 Before proceeding with the tension of the belt, it must first be attached to the crankcase of an automobile engine, which is recommended to be done with a long bolt. At the same time, the generator should still move freely up and down. After that, look for an arcuate bar in the upper part of the device, which has a slot in it and is fastened with a nut, which also fixes the correct position of the generator itself. Next, we directly tension the belt by performing the following steps:
1. We unscrew the fixing nut, which is located on the generator bar.
2. Using a mounting spatula or other improvised tool, carefully wring out the generator from the engine.
3. Tighten the nut back.
4. We check how this affected the belt tension force. If it still sags, the procedure must be repeated.
We use an adjusting bolt to tighten the alternator belt
A more modern and versatile way to tension an overly long alternator belt is to use an adjusting bolt. In order to achieve the desired result, you will need to complete the following list of works:
1. Loosen the top and bottom nuts that secure the generator.
2. Turn the adjusting bolt clockwise while gradually and carefully moving the generator away from the block. It will be very good if a partner works with you, who during the implementation of this procedure will assess the degree of belt tension.
3. Tighten the fixing nuts of the generator until it stops.
 At the end of the alternator belt tension procedure (regardless of which method you used for this), it is necessary to perform 2-3 turns of the crankshaft using a special key. After that, again check the belt tension. Once again, it is worth checking the effectiveness of the work performed after a trip by car. If such a procedure did not help restore the functionality of the belt, it should be replaced with a new one, while immediately choosing the required length.
It is necessary to draw your attention to the fact that if it became necessary to tension the belt, which stretched during operation, its further use should not be too long. This is due to the fact that after stretching, the belt loses a number of its properties and can no longer fully fulfill the task assigned to it. So, when tensioning such a belt, you should immediately be ready for its quick replacement.
Subscribe to our feeds
Drive belt for generator, power steering, timing and air conditioning ...
Hello dear readers of the blog site. Let's talk today about the alternator drive belt, the auto repair kit of which should always be kept in stock. A drive belt is an effectively low cost means of transmitting the rotation generated by the movement of an engine shaft to engine accessories such as a generator.
Several units are driven by one rubber drive belt at once: generator, pump, timing, power steering pump, air conditioning compressor, radiator fan. When operating a car, it is necessary to regularly check the condition of the rubber, as well as the tension. To avoid engine breakdowns, it is necessary to replace rubber repair kits in accordance with the machine maintenance instructions.
Video:
Automobile rubber drive straps, simply speaking, there are several types - wide, narrow, serrated, smooth, each car has its own size and shape. To reduce wear on the side parts and give integrity, wrapped ones are used; cotton with nylon is used as an outer covering. Toothed belts provide forces with the help of transverse teeth and a drive mechanism, while maintaining a predetermined arrangement of the shafts. When operating a car, it is not recommended to lubricate them with oil, they actually do not stretch and do not vibrate, they last longer than smooth ones.
With the improvement of technology, various types of repair kits began to be produced. For injection cars, multi-stranded wide ones are produced, which consist of several drive belts welded together. Due to this design, there is a uniform distribution of the load between the streams, as a result, repair kits for rubber products have an increased service life of the car. It can simultaneously turn the pulley of the generator, power steering, air conditioning compressor.
The wedge belt is designed to accurately match the speeds of rotation of the pulleys of the units. Good driving properties have double-sided v-belts. To transmit high powers, poly-wedge rubber drives are used, which have teeth at the bottom and flat at the top.
Before you buy Lada car belts or other auto repair kits for rubber products, you need to look at such parameters as profile, width, pitch, number of teeth, good quality, dimensions in width and length must correspond to the brand of the operated mechanism.
Photo of VAZ car drive belts, their design numbers:
Consider a photo of the drive belts of the generator, fan, radiator and rear water pump drive cars family classic VAZ 2101-2107.
Design number:
- 2101-1308020 smooth old sample size 10x8-944
- 2107-1308020 toothed new sample 10.7x8-944
Lada 2101-2107 "smooth" of the old sample, size 944
Lada 2101-2107 "toothed" new sample, size 944
Next are photos of a geared new model and an old smooth rubber drive of a generator, a pump, a radiator fan from VAZ 2108 cars - “eights” to -21099 “ninety-ninths” with carbureted engines.
Design number:
- 2108-3701720 size st / arr. smooth 10x8-715
- 2108-3701720-01 size new/rev. notched 10.7x8-715
Lada 2108 carburetor "smooth" of the old sample, size 715
Lada 2108 carbureted engine"toothed" new sample, size 715
Photo of a rubber drive of a multi-strand wide, for transmitting the rotation of auxiliary units of the engine of an injection car VAZ from 2108 to 2115.
Design number:
- 21082-3701720 size - 698
Lada 2108 -2115 size 698 "wide"
Photo of a wide multi-ribbed rubber drive for transmitting rotation of auxiliary engine units of an injection car VAZ from 2110 to 2112 without power steering and air conditioning.
Design number:
- 2110-3701720 size - 742
Lada 2110-2112 size 742 "wide"
Design number:
- 1118-1041020R size - 882 (without power steering and air conditioning)
- 4091.1308020-01 size from 995 to 1054 (1118 with air conditioner)
Lada Kalina size 882 "wide"
Photo picture of a multi-V-ribbed belt with a lot of rivulets wide for transmitting rotation of auxiliary engine units injection car from VAZ 2110 "dozens" - up to 2112 "dvenashki"; 1118-Kalina and 2170-Priora with power steering.
Folk wisdom will never lose its relevance: “If you want to do it right, do it yourself!”.
Changed timing belt before vacation. The procedure requires certain skills and knowledge. I don’t even have an alphabet, so I didn’t surf the Internet and gave the car for service.
As I wrote below (), after replacing the timing belt, an engine operation error popped up, it turned out that they forgot to connect the chip to the adsorber in the service.
After replacing the timing belt, I traveled a bit - I went on vacation. When I arrived, I began to notice that often at the first start of the engine, the alternator belt began to whistle.
I checked the battery light on the dash, but it didn't come on. I consoled myself that the humidity, maybe the strap loosened a little ...
A week has passed, when suddenly the power steering seemed to turn off for a couple of seconds. At first I thought that the car had stalled, but no.
He stopped, opened the hood and immediately to the generator belt ... And threads stick out of it and one side is completely worn out.
Apparently, the idiots from the service, who changed the timing belt "for free" put the alternator strap in place, one track did not fall into place. And they probably thought that they would jump in later. And this very track was eaten by the rollers.
I went to the car market, bought a new strap for 600 rubles (I didn’t know the prices and don’t know now, but I didn’t want to waste time looking for cheap ones or alternatives, and I wasn’t in the mood either).
Approached the seller: "alternator belt for dvenashku, 1.6-liter engine, 16 valves with power steering."
- 620 rubles.
- Let's.
Called sidekick, asked for help to change the strap. I drove home, searched the net for instructions on replacing the belt on the 12th with power steering. I heard that there are some nuances that you need to remove the engine from the pillow.
I ran through the forums, printed out the highlights and moved to the garage.
Now, after yesterday evening, I say: “This is 3.14 ... if you don’t know, then don’t write your advice on the forum. If you have 8 cells, then you don’t have to say that on a 16-valve with power steering everything is the same as on 8, you just need to remove it from the pillow. ”
Yes, everything is written clearly: here is the instruction that I found and to which it was signed “only it will be necessary to remove the engine from the pillow.”
Fuck, comrades!
They removed from the mounts so as not to interfere, the adsorber and the power steering fluid reservoir.
We unscrewed the lock nut with a wrench 13.
(photo from the Internet, a locknut with a shackle, where the hose from the power steering fluid reservoir is fixed to the clamp)
They began to look for a tension bolt, but it was not there!
Maybe someone has a VAZ-21124, but we searched everything around without success. Moreover, on one of the forums, one of the discussants also unsuccessfully tried to find this bolt, and another participant, foaming at the mouth, argued that the bolt was 100% there.
I will not dwell on the discussion of the forums and will continue to explain how we changed the strap.
So,
1) Using the "13" wrench, loosen the nut securing the generator to the mounting plate.
The alternator can now be pushed towards the engine by loosening the belt tension.
2) Then, having examined the videos, one turned out to be painfully similar to the tension one, they tried to loosen it and that's it!
We loosen the TENSIONING ROLLER.
The strap is now even looser and should come off the rollers with ease.
3) Now you need to remove the engine from the support. To do this, unscrew 2 bolts.
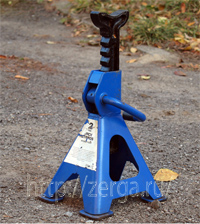
4) Now raise the engine. We lifted it with an ordinary hydraulic jack, slipping it under the crankcase.
The engine mount will lift up and the belt can be pulled out.
5) Now we push a new strap under the engine support. And start reassembly.
6) We clamped the tension roller in the extreme position (corresponds to the minimum belt tension).
7) The generator was also moved to the most extreme position (as close as possible to the engine).
8) Now the most difficult thing is to pull the new belt over the rollers ...
The main thing is to wrap it tightly around all the rollers before pulling on the last one (we pulled on the tension roller).
We smeared it with a little WD40 to make it climb more confidently.
In the 4th hand, with the help of a hammer, crowbars and boards, they threw the strap onto the tension roller. Suffered for 20-30 minutes.
It turns out there is a special key that serves to adjust the timing belts and generators. It's probably him:
I think it will greatly facilitate the process, but we did not have it and I found out about its existence later.
9) When the strap is on rollers, you can start stretching.
We did this:
with a hammer handle, I pulled the tension roller with force and fixed it in this position.
Then they crimped the bolt with a lock nut, which was loosened and the generator was in its extreme position (closer to the engine).
I guess it should have been done differently...
Pull the generator as far away from the engine as possible (pulling the belt a little) and fix it first, and then work with the tension roller.
When starting the engine and degassing (gas - throwing gas), the strap should oscillate a little, flounder.
If at the same time he still does not whistle, then the tension can be left as is.
So, the conclusions and features of replacing the alternator belt with a VAZ 21124 with power steering:
1) It is necessary to lift the engine from the support and remove / start the strap under the pillow.
2) The belt tension (in my case) was adjusted using a tension roller. Tension Bolt NO!
3) The main thing is not to overdo it with the belt tension.
4) I saw disputes about the size (length) of the belt. I put this one on my VAZ 21124 with power steering:

Related Articles