Transfer box dymos UAZ Patriot. Transfer case dymos UAZ Patriot New gearbox UAZ
1. Remove the fork 5 of the clutch release bearing and the bearing
2. Remove the shift cover with lever assembly.

3. Remove the lamp switch reversing.

4. Remove the stem head pin using a thin barrel bit.

Turn away a bolt of 1 an axis of an intermediate gear wheel of a backing on a transmission case.

5. Turn away flange bolts and by means of a magnet take out springs and plungers.

6. Turn away bolts of fastening and remove a cover of the bearing of an input shaft.

7. Remove the bearing 1 of the input shaft, having previously removed the snap ring 2.

8. Remove the front gearbox housing by unscrewing the mounting bolts (shown by arrows)

9. Remove the circlip 4 of the output shaft bearing, the circlip 1, the protective ring 2, and the two circlips 3

10. Turn away a bolt of 1 an axis of an intermediate gear wheel of a backing on a back case of a transmission and remove an axis.

11. Using a bead with a thin cylindrical end, you press the locking pins of the shift forks.
Remove the shift rods.
Attention! Do not reuse lock pins.

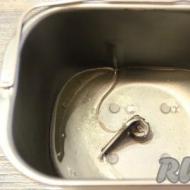
12. To dismantle the output shaft assembly, intermediate shaft assembly and rods from the rear gearbox housing, heat the rear wall of the housing in the area of the dual bearing with an electric heater.
Note:
To facilitate dismantling, secure the output shaft, intermediate shaft and shift shaft with a rope or belt and hang;
Heat the rear wall of the crankcase at 400°C for about 4 minutes.
Attention! To avoid damage to the bearing, do not use a press or hammer to remove it.

13. After heating, dismantle the shafts by lightly hitting the rear crankcase with a rubber mallet
So so. the problem was as follows, when driving, if you quickly stick in 3rd gear, you can hear (and feel it on the handle) a noticeable crunch. If you stick slowly and carefully, then without a crunch. And the more you push the lever, the stronger the crunch. And the slower the greater the likelihood of a perfect gear shift. The diagnosis is simple, the synchronizer has worn out. To replace, you need to throw off both boxes and disassemble. For one I will replace the noisy bearing promvala.
removing the transfer case, as it turned out, is not at all difficult even without a hole, we unscrew the bolts, pull it and it falls,
you need to put something soft on the floor, because it’s impossible to hold 40 kg in a twisted state under the car
the box is even easier to remove because it hangs on chains, it can be gently lowered
I will lower the transfer case to 3.3 but later, so I took it apart to see the number of splines on the shaft, since there are options for 12 and 18 splines, a lowering kit is made for the option with 18 splines
To pull off the washout bearing is, I must say, a test for the nerves. At the beginning I tried to weld that
then to the bearing and pull it off, but the welding broke. My recipe is as follows: we take two long bolts, file the hats with a grinder, on the sides to make an oval, break the separator in the bearing, put the boots into the bearing and wedged. then press out with a puller
In the box itself, I haven’t removed the stars on the shaft yet, I just bought a three-legged puller today, so to be continued, criticism and advice are very welcome, since I myself am repairing the box for the first time. no repair experience yet.
UAZ Patriot 2008, petrol engine 2.7 l., 128 l. p., AWD drive, Manual - DIY
Machines for sale

UAZ Patriot, 2013

UAZ Patriot, 2015

UAZ Patriot, 2013

UAZ Patriot, 2017
Comments 41
Hello, tell me how you removed the input shaft without removing the output shaft gear? Does it hit the gear?
with the help of this puller, I was only able to remove the bearing from the input shaft. For about 4 hours I "cared" it with a "make" with a sledgehammer in a suspended state and nothing, it dispersed by a centimeter and that's it. I bought a bearing for the input shaft, now it remains on the industrial shaft front bearing find and you can collect everything in place.
Russian ingenuity is our EVERYTHING.
Good day. The problem is this: the transmission began to turn on with a crunch. from the second to the third with a crunch, from the third to the second with a crunch, from the second to the first it turns on almost to a complete stop, you stand at the transfer point, everything turns on without a crunch, what is the reason? I replaced the clutch kit with a STARCO with a double damper, the gears also turn on with a crunch, in the mornings, while the cold one warms up quietly, the clutch starts to rumble harder than on the old one, you squeeze the clutch pedal quietly and release the rumble again. Where to dig roofing felts clutch roofing felts checkpoint? Hunter ZMZ 514
We don't do abortions online.
Hello good people ... my problem is this: the diamonds checkpoint began to make noise + buzz on a UAZ patriot 2008 onwards. decided to disassemble and change the bearings. Changed four main bearings. After assembling the gearbox, the noise + hum disappeared ... but a knock appeared ... the gearbox knocks at idle and in all gears ... but when the clutch is pressed, the knock disappears and the clutch release and the clutch disc put new ones ... please tell me what could be? Thanks in advance
what was the cause of the knocking?
I also have a new one. I switch a little slower and that's it
maybe it should be?
I have an escape of 166tyk with a penny, I climbed everywhere except for the checkpoint, I use it mercilessly, without embarrassment, sometimes it also crunches, in any gear, but this is from a hasty shift and underpressure of the pedal. And until the stake rises, I won’t climb, because The gearbox is the most accurate and with minimal tolerances unit of everything that is in the car.
What a tin… It's on new car? How much mileage?
she is not new)) 72
about how. questions such, all at once so that later on a new one does not climb?
Exactly. I regretted that I did not change everything at once, stinted on the price. Now I'm waiting for spring to shoot the korobas again and bring it to mind.
Congrats on opening the box. The procedure is painfully familiar and hemorrhoids! That bearing that you worked so hard to remove is the input shaft bearing. It was possible not to touch it, but simply remove the bell, and the bearing itself would remain on the shaft. Now the next thing, if you climbed there, then change all 4 bearings at once, namely on the input shaft, which you removed at the very beginning. Bearing-gland between the box and razdatkoy and two conical bearings of the prom shaft. And change synchros 1-2 and 3-4 gears. If there are any questions, ask.
Greetings to all, where did you buy spare parts for the synchronous box, gears?
I took a normal flight from a guy here vk.com/kppdaymos
Congrats on opening the box. The procedure is painfully familiar and hemorrhoids! That bearing that you worked so hard to remove is the input shaft bearing. It was possible not to touch it, but simply remove the bell, and the bearing itself would remain on the shaft. Now the next thing, if you climbed there, then change all 4 bearings at once, namely on the input shaft, which you removed at the very beginning. Bearing-gland between the box and razdatkoy and two conical bearings of the prom shaft. And change synchros 1-2 and 3-4 gears. If there are any questions, ask.
Aren't the old synchros left by chance? Do you have sizes of bronze rings?
So the checkpoint is on the workbench. Where to begin? Now, I would start by screwing this gearbox back on and never mess with it. Joke type. However, every joke...

All the same, you need to start by studying the only manual for repairing daimos that exists at the moment: tynts (third-party resource).
After studying this crooked manual, and it is really crooked, you will begin to have a vague feeling that you still cannot characterize in any way. Later, yes. But not right now. Everything is rosy now...
Unscrew the cover of the gear shift rod. Please note that all joints are flavored with a sufficiently high-quality sealant, and the screws sit on the thread sealant. Therefore, the process of separating the penetration from the non-piercing is difficult in most cases.


Along the way, we inspect the rubber boot of the switch rod.

Then, with a 24 spanner, unscrew the reverse gear engagement sensor.

Please note that it is sealed with a copper washer. According to science, they are disposable and when the sensor is put back in place, the barrel changes to a new one. Otherwise, oil leakage is possible.

We return to the box of the stock switch gears. We unscrew this bolt that closes the technological hole. It serves to unfasten the stem.

To my shame, I must admit that until that moment I had not yet had a normal set of drifts. And instead of punches, I used old, unnecessary, not beautiful, and for any reason, only known to me, guilty drills of a suitable size.
 This is how we knock the pin out of the stock.

We also pay attention to the thread sealant and the copper washer.

Now, we unscrew the three bolt-covers from the wells of the locking rods of the speed changers. It also has thread sealant.

We stock up on a small magnet and use it to pull out the springs and locking balls. How Alternative option, rolls turn the gearbox housing upside down and lightly tap ...

That's all for now with the rear of the gearbox. Let's go to the bell.
Unscrew the front cover. I entrusted this business to the younger generation 😉


When the cover is unscrewed, this does not mean that it can be removed easily. Because the sealant stuck it well enough. It is extremely convenient to pick up the edge of the cover with a long flat screwdriver, through the starter hole in the bell and pry off the cover with a lever. Along the way, we evaluate the condition of the gland in the cover.

Now a small Kama Sutra with the removal of the retaining rings. I don’t know how anyone, but they were very dreary for me ... And this is with a normal tool for removing them ...

In general, after the input shaft in the area of the front thrust bearing the retaining ring is removed, the manual says the following phrase: "Remove the bearing from the shaft."
This is the first place where the break of the namba van pattern begins. For bearing:
- flush and flush
- closed type
- sits not just tight, but VERY tight ...
In general, in fact, it is not necessary to perform the "Remove the bearing" item at this stage. Take my word for it. Although ... If you have a tendency to masochism, then by all means try it. I guarantee the result!
I came to the conclusion that it is necessary to halve the gearbox housings without removing the bearing.

We unscrew dofiga bolts around the perimeter of the joint. Please note that there is another screw in the gearshift box, above the stem!
I must also say that the halves sit very firmly on the guide bushings. There are only two of them, but it’s still impossible to easily separate the halves. Plus, there is a strong sealant, be it wrong. In general, when you have a gap, carefully increase it with improvised means until you rest. And you will stumble! The gap will be about a centimeter and a half in size.
From this moment on, the break of the namba tu pattern.

The bottom line is that the front support bearing sits VERY firmly on the input shaft. And, of course, it prevents the gearbox housing from being cut in half.
From the photograph, the essence of the process is clear. We hang out whoever can in their conditions. We take a piece of soft material such as copper / aluminum / duralumin. This piece will be a spacer between the end of the input shaft and the popularly loved universal key, the Earth-to-Earth class, the Sledgehammer type ...
We put a gasket made of soft material on the end of the input shaft. With the help of the mantra “How great is my love for the fucking Chinese engineers”, the memories of a certain mother and the reciprocating movements of a special key of the “Slemhammer” type, we separate the bell with a support bearing from the input shaft.
Exactly after this stage, the bearing can be easily removed by hand from seat in the bell that will be on the floor 😉
Back to filet...
To remove the rear gearbox housing, it is necessary to remove the pusher rod of the gear shifters. To do this, it needs to be pinned. Attention! There are two short pins, not one long one like on the shift forks.

Unscrew the second bolt securing the reverse gear axle.

And remove the retaining rings from the output shaft shank. Remove the retaining crescents and remove the retaining ring from the output shaft double support bearing.


At this point, you will be waiting for a break in the template number s…
Because the manual says that it is necessary to unpin the shift forks and shift pushers. How this is supposed to be done when a good half of the pins are in the depths of the crankcase is not clear. But, if we remember that Chinese electricity has not yet been studied at all, then it’s even scary to think about Chinese mechanics ... Qigong is there, Shao-lin and all that ...
In general, we tie all the offal as is and hang it again. We try to adjust the suspension so that the belts do not put pressure on the 3-4 gear shift clutch and the axis of the shafts is as perpendicular as possible to the mother earth plane. If you move the clutch more than usual, then an amazing adventure is guaranteed to search for the catapulting synchronizer balls in the amount of three pieces. Again, for masochists, the next stage in delivering unforgettable pleasure to themselves ...
Then we need to heat the crankcase around the double bearing. I used a prom.hair dryer for this. The temperature is 500 degrees, for five to ten minutes. So that the crankcase would be overheated. Then, with reciprocating movements of the rubber mallet of the “Narcosis” class, we present the crankcase housing. The duration of the execution does not depend on anything and is purely random. Tested on a triple assembly / disassembly of the assembly (then I will tell you why) ...

Attention! In the gearbox housing, in the area of the partitions of the rod wells, there are two plungers. Don't lose them when turning the crankcase over. You won't find these later!
If you have not catapulted balls out of sync - you are lucky. At this stage, you can pour yourself 100 grams of good cognac and postpone further work for “Morning, wiser evenings” ...
Take my word for it 😉
Dear my readers!
Do not ask me questions about the repair of your gearbox please! Firstly, I cannot and do not have the right to give advice without seeing the unit with my own eyes and without holding it with my own hands. Secondly, it is approximately how to make a diagnosis over the phone. No analyses...
This blog post is for informational purposes only. Its purpose is to show you clearly the giblets and general methods of working with this checkpoint. No more.
26 thoughts on “ UAZ Patriot. Disassembly of the checkpoint "Dymos" (Daymos). ”
Please tell me this Korean crap has its own handout or you can shove a simple UAZ one just the guys gave me a loin and I don’t know if it’s worth bothering or not
At this checkpoint, both the old-style RK (UAZ) and the new Daimos were used.
Hello. when landing in place of the secondary shaft of the promshaft and rods with forks, one of the rods does not sit down to the end. Apparently, the pin blocking the inclusion of two speeds at once interferes. What should I do?. (I did not unpin the third gear plug).
Ilya, hello. If you yourself do not see or are not sure of the reason (“apparently the pin interferes), then how can I answer you? By the Internet. I don't see the unit.
Hello. I got a noise in the box like a tractor. I checked the oil, it wasn't there. Then they opened it and where the gears of the 1st shaft were like a knife. And the gear of the block is exactly the one that connects to the 1st one, it was covered on one side. And we found a box with a whole body of a burnt Oise that was driving only 2 months from the salon. And they opened this box and removed from it the 1st shaft and gear block. All gathered in place put a box. 1) The sound there has decreased by 80%. 2) the speed on the 4th is inserted tightly)) 3) it is inserted into the rear spruce and when you release the turnover, it immediately ejects. I have such a problem. Do you have a video of the complete overhaul or any advice?
According to the video, only what was posted in the reports. And I can't give you advice. Because I didn’t twist your box with my hands 😉
Thank you for a very good report, the conclusion when reading is unambiguous ... In case of breakage of the daimos box, buy a new box)))
And so I was looking for where are the most, well, which can be brought under the hood. Just found you, thanks.
Hello, where can I buy a 3.4 gear shift fork Daimos? Patriot 2005.
REPAIR of UAZ gearboxes of all models (ADS, DAYMOS)
manual gearbox
installation | sale | replacement of UAZ manual transmission of all modifications
clutch replacement
Moscow city
Artem 8 965 126 13 83 Vadim 8 925 675 78 75
Disassembly and troubleshooting of your gearbox is carried out within 2 hours in your presence.
The cost of disassembly and assembly - 5000 rubles. + spare parts subject to wear.
Removal and installation of the box on the car /during repair/ - 7000 rubles.
Warranty 3 months or 60,000 km. run.
New UAZ gearbox
We have a fund restored UAZ checkpoints. If the car owner wishes, we can replace the faulty one with ours from the exchange fund, which is often more cost-effective.
Prices for additional work when repairing a UAZ gearbox:
Job Title
Sum
Complex troubleshooting (dismantling assembly without repair)
Oil change and diagnostics
Clutch replacement (as a separate job)
Removal and installation of a manual gearbox as a separate work - without repair
Replacing the clutch with the gearbox removed
An example of assembly disassembly of the UAZ ADS gearbox
The owner of the car drew attention to the harsh noise that appeared when driving on the highway in fifth gear. During disassembly, the following was found and must be replaced: a damaged intermediate shaft, a set of bearings, a fifth gear fork, oil seals, an inter-case gasket. An example in the photos below:
The second example of the UAZ ADS box - the owner also complained about harsh noise when driving in fifth gear. When disassembling the gearbox, a broken gear tooth of the fifth gear was revealed (the intermediate shaft is intact). Plus, bearing shaft bearings and seals are subject to replacement. We wash the inside of the body with nefras (industrial solvent) to remove steel chips and old oil.
UAZ gearbox diagram
gearbox assembly
gearbox housing uaz
UAZ transmission gears
UAZ gear selector forks
linkage gearbox uaz
razdatka gearbox uaz assembly
UAZ transfer case gears
UAZ transfer case shaft gear
UAZ transfer case gear selection
Gearbox UAZ 3151 (after overhaul).
Replacing bearings and seals gearbox.
UAZ gearbox specifics: typical faults and features of repair
Functional differences between ADS and Dymos checkpoints
Technical features of the UAZ BUHANKA gearbox
Advantages and features of the UAZ FERMER checkpoint
The specifics of the transfer case of modern UAZ modifications
Photo report of disassembly and repair of the UAZ HUNTER gearbox
The car was sent in for repairs due to the harsh noise from the manual transmission. As a result of disassembling the box, a defect in the bearing bearings on the gearbox shafts was revealed. We change bearings, gearbox seals. We wash the gearbox housing with nefras from inclusions of steel chips and old oil. Photos below.
An important part of any car is the gearbox, with the help of which it is possible to change the speed of movement. vehicle. Cars that come from the Ulyanovsk conveyor and are called UAZ-3163 are also equipped with a Dymos or Daimos gearbox. This element is a mechanical five-speed box gear made in Korea.
This unit on any car does not require frequent repairs and maintenance. All that is needed to maintain this undemanding mechanism on the UAZ Patriot SUV is periodic monitoring and oil changes. Over time, the gearbox shows the first signs of malfunctions, as a result of which, as a result of the discovery of which, repairs should be carried out immediately, otherwise the entire mechanism will need to be replaced, which is an expensive element. Today we will consider the procedure for disassembling the Daimos gearbox on the UAZ Patriot SUV and find out in which cases it is necessary to repair this unit.
Design and features of the device
On the UAZ Patriot SUV, the Dymos gearbox is a mechanism inside which there is a set of gears of various diameters. The drive mechanism, presented in the form of a lever and brought into the interior of the car, allows you to change the gears while driving, which actually makes it possible to develop a high speed of the car. The gearbox design diagram is shown below.
During the operation of the UAZ Patriot car, it is important to periodically diagnose the gearbox, or rather, check for a certain oil level. Butter is lubricant in which the device operates. The oil level may be low due to defective seals and gaskets, which must be replaced before new oil is added. The oil change period for a new one is 60 thousand kilometers, as recommended by the manufacturer.

The gearbox is not a demanding mechanism and does not need to be adjusted. Periodically, it is necessary to check the fastening of the device, as constant vibrations can provoke self-unscrewing of bolted connections. In case of detection of such malfunctions as:
- spontaneous knocking out of the transmission;
- problematic inclusion;
- extraneous noise during the operation of the device;
- impossibility of inclusion of this or that transfer.
All these signs are important reasons that in the future the gearbox may fail at all. Therefore, if one of these reasons is found, the device should be disassembled and the appropriate repair should be carried out (replacement of gears or wings). Let's consider what is the dismantling of the Dymos gearbox on the UAZ Patriot SUV.
Gearbox disassembly
Before proceeding with the disassembly of the gearbox, this mechanism, together with the transfer case, should be removed from the car. How this is done can be found in the relevant material. Let's proceed to the consideration of the process of disassembling the checkpoint on the UAZ Patriot SUV.

- Initially, the bearing yoke 5 and the bearing 6 itself (indicated in the diagram above) located on the box shaft must be dismantled.
- The next stage involves the dismantling of the cover of the mechanism responsible for gear shifting. The cover is removed together with the shift lever.

- A sensor for turning off the light signaling when reversing is installed on the gearbox structure, which is also subject to dismantling. It must be unscrewed with a wrench.
- The rod head pin is removed, using a test with a hammer. You should also unscrew the bolt number 1 (photo below), which is the axis of the intermediate reverse gear.

- The flanged bolted connections are unscrewed, after which, using a large magnet, remove the springs and plungers inside.
- We proceed to the process of dismantling the input shaft bearing cover, having previously unscrewed the bolted connections.
- Before removing the bearing from the input shaft, it is necessary to dismantle the snap ring number 2.

- The front crankcase of the Daimos manual transmission of the UAZ Patriot SUV is removed. To do this, unscrew the bolted connections shown by the arrows.

- From the side of the output shaft, the following elements should be dismantled:

- retaining ring 1;
- protective ring 2;
- two retaining half rings 3;
- large retaining ring 4.
- The bolt number 1 is unscrewed, which is the axis of the reverse intermediate gear. After unscrewing it, the axle should be dismantled.

- With the help of a thin breakdown, it is necessary to press out the locking pins, and then remove the gearshift rods. Locking pins must be replaced with new ones after removal.
- To carry out the separation of the rear crankcase from the secondary shaft, it is necessary to hang the device by the secondary shaft. After that, the rear wall of the crankcase should be heated until it is separated.
- The heating time should be about 5 minutes at a temperature of 400 degrees. After warming up the cover, the shafts should be separated using a hammer.

In system all-wheel drive SUV UAZ Patriot there is such an important node as the transfer case. This mechanism necessary for the redistribution of torque between the drive shafts.
Until 2013, the Ulyanovsk manufacturer equipped its new UAZ Patriots with a mechanical transfer unit. Then the developers decided to upgrade the drive. Among the main updates was the replacement of the regular handout with a more advanced Korean Dymos mechanism. But only the company is Korean here, and the production of the unit itself is carried out in China.
Our article will tell you about what the Daimos razdatka for UAZ-3163 is, where it will be considered design features node and the main advantages over the classical mechanical design. Let's talk about when repairs are required, during which the scheme is useful.
Transfer case features
The Daimos transfer case, which UAZ Patriot is currently equipped with, is a two-stage gearbox, where the gear system is placed in aluminium case. The main transmission link in the unit is the chain, through which the moment is directed to the front axle. The transfer unit is controlled by a special electromechanical mechanism that allows you to select different driving modes.
For example, in traditional mechanical box gear selection, the role of the switch is performed by a lever, which is acted upon by the driver through manual effort. Today, the specified lever has been replaced by a control washer, which is located between the seats. This regulator has increased the comfort of driving an SUV.
One of the main advantages that the new Daimos dispenser has is its ability to withstand increased loads. In addition, the new unit has increased in size compared to its predecessor. This resulted in a design change cardan shaft rear axle UAZ Patriot, after which it began to be produced in one piece. Previously, this transmission element was a pair of hollow pipes that had an intermediate connection segment. Now this link (bearing) is missing, which favorably helps to reduce the level of vibrations and increases the resource of the entire mechanism.
Also, the design of the transfer unit made it possible to abandon many gears and shafts that were present in the old box. Now in the Dymos unit, the torque transmitter is a chain, which significantly reduces the noise of the mechanism as a whole.
Note that in order to increase the clearance, the manufacturer raised the new transfer case and fixed it as high as possible. Now the clearance is 320 mm.
To ensure the possibility of installing a Korean box in the UAZ Patriot drive system, the designers had to change the transmission tunnel. Its steel dimensions are larger. Due to the larger dimensions of the new transfer unit, the developers had to abandon the manual brake mechanism. Previously, the handbrake blocked the rear cardan, and the mechanism itself was located near the transfer case. Now, special mechanisms are responsible for blocking the wheels, located in close proximity to the disks.
- Ensuring better cross-country ability, because now gear ratio the main stage of the unit is 2.56 instead of 1.94, as it was on the old razdatka. The SUV has become able to confidently overcome obstacles when the Daimos transfer case is on it.
- The new box is easy to manage. This became possible due to the presence of a progressive regulator, which the manufacturer placed on the central tunnel.
- The absence of third-party noises that a mechanical dispensing unit could previously emit.
For the updated UAZ Patriot, an upgraded gearbox has become available. It was kindly introduced by the same company - Dymos.
Gearbox from Dymos on UAZ Patriot
The unit is equipped with a five-speed gear selection mechanism, which, in terms of reliability, has proven itself with positive side. The box requires a minimum of care and is famous for its excellent resource. Despite the fact that the Daimos transmission and transfer case are combined units, the manufacturer has provided lubricants with different consistency for them.
To remove the transfer unit for the purpose of repair, it will be necessary to resort to the simultaneous dismantling of the transmission unit. A scheme is suitable for this purpose. Only after such a procedure will it become possible to disconnect the mechanisms. The units are connected by means of nuts. Between the cases there is a layer of sealant.
In the photo we see a Dymos transmission combined with a transfer unit.

If there is an interest in the technology of dismantling and disassembling the box, then it can be found here on the site.
Now let's talk about the types of malfunctions that are typical for the UAZ Patriot dispensing unit, and the reasons for causing them. It is likely that after the diagnosis, your car will need repairs, and a diagram will come in handy for this purpose.
Breakdowns and causes of the transfer case
Despite the fact that, in general, the Korean razdatka Daimos is a fairly reliable unit, the fact of impact cannot be ruled out. various factors that cause malfunctions. What are these breakdowns?
- The downshift in the box began to spontaneously turn off.
- There was a leak of lubricant from the body of the unit.
- There was a noise of the mechanism, accompanied by vibration.
- The presence of traces of teeth crumbling and play in the bearings.
- Reduced chain tension.
What causes such malfunctions? The reasons may lie among the following factors:
- The components of both the transfer case itself and the transmission unit were worn out.
- The owner is inclined to drive for a long time with the front axle activated, having no need for it.
- Systematic impact of increased loads caused by improper operation of the dispensing unit.
- The use of a lubricant that does not fall under the manufacturer's regulations.
- The mounting of the motor pillows has loosened or these components have become unusable, which will be indicated by vibration at startup.
- Prolonged exposure to vibrations, which can be caused by incorrect tire pressure or other factors, including wear on the driveline.
- Incorrect modifications of units in the UAZ Patriot drive system.
When the indicated signs appear, the owner of the UAZ Patriot is recommended not to postpone the diagnosis of the drive for a long time, but to take measures to identify malfunctions as soon as possible and eliminate them. And if repairs are required, the scheme will help in this matter.
Summing up
Let's bring important information! Some owners set out to replace the old razdatka with a new unit. Is it possible to do so? It is possible to install a Korean node on a UAZ Patriot, but some work will be required. Repairs can be carried out independently, this will help the scheme. Here it is necessary to replace the tunnel casing, cardan gears, transmission unit frame cross members, handbrake drive mechanism, electrical wiring and fuel lines.
Problem: when driving, if you quickly put in 3rd gear, you can hear (and feel it on the handle) a noticeable crunch. If you stick slowly and carefully, then without a crunch. And the more you push the lever, the stronger the crunch. And the slower the greater the likelihood of a perfect gear shift.
Diagnosis: worn out synchronizer. To replace, you need to throw off both boxes and disassemble.
(For one I will replace the noisy promval bearing)
for support we use a wide cable and hoist


removing the transfer case, as it turned out, is not at all difficult even without a hole, we unscrew the bolts, pull it and it falls,
you need to put something soft on the floor, because it’s impossible to hold 40 kg in a twisted state under the car

the box is even easier to remove because it hangs on chains, it can be gently lowered
box dymos

Razdatka UAZ


I will lower the transfer case to 3.3 but later, so I took it apart to see the number of splines on the shaft, since there are options for 12 and 18 splines, a lowering kit is made for the option with 18 splines


To pull off the washout bearing is, I must say, a test for the nerves. At the beginning I tried to weld that
then to the bearing and pull it off, but the welding broke. My recipe is as follows: we take two long bolts, file the hats with a grinder, on the sides to make an oval, break the separator in the bearing, put the boots into the bearing and wedged. then press out with a puller


.jpg)
In the box itself, I haven’t removed the stars on the shaft yet, I just bought a three-legged puller today, so to be continued, criticism and advice are very welcome, since I myself am repairing the box for the first time. no repair experience yet.


We continue the repair, for pressing out the gears I used a three-legged puller (bought for 600r). I dismantled everything in about half an hour, everything turned out to be simple

4th gear synchronizer, thickness 3mm exactly

3rd gear synchronizer, apparently worn 2.85 mm

maybe these 0.15 is enough for a bad inclusion


The 2nd and 3rd gear synchronizer needs to be replaced. To my surprise, this detail was not found in our city. I got into the Internet, I know only 3 spare parts stores that 100% do not throw uazobaza.ru, bazashop.ru and 3160.ru. These parts are not in them! I searched with Yandex, (I can do this) those stores that he shows did not inspire confidence, the phone number and address were simply not specified, I'm afraid of a scammer. For example: www.uazlyuks.ru/index.php...t/product&product_id=1630 the site is generally made in the ukoz constructor, I myself can cut it down in a day.
In short, the question is simple: who ordered spare parts via the Internet and in which store? Give me a link, and I'll look for a sync there myself. And then there were incidents. Thanks in advance.
Related Articles