Vaz 21099 do-it-yourself dashboard tuning. photo report on tuning the dashboard
Dear friends, I present to your attention an additional series of photographs of a wooden torpedo in my 99-ke. I tried to shoot everything in more detail in order to convey the real sensations of being inside the car as much as possible. In the first photo, "jambs" are clearly visible under the buttons for foglights, heating rear window and emergency lights.
The fact is that when I started making a torpedo, I initially sawed holes for installing large buttons from a KAMAZ or from a bus, I don’t remember exactly from what. But it was not possible to find pads for connecting wiring to these buttons. Therefore, at the last moment, it was decided to leave regular buttons. I had to put wooden patches, which are clearly visible in the photo. The TV is fixed with inside torpedoes. Outside is not removed. The rear view camera is now on. But you can switch the video input to the radio. Then you can watch cartoons. The switch button is located on the lining of the tunnel. The iron socket under the TV was made by electrochemical engraving. This method was subtracted on the Internet. But I had to experiment for a very long time on various pieces of iron before we managed to develop the optimal technology suitable for home conditions.
I almost never use the radio for its intended purpose. Instead of music, I listen to the engine. And in the radio turned out to be a very useful function - a self-tuning clock. Close-up of the lid of the glove compartment with a squirrel.

She's not on a loop. It just pops out like a cork from a bottle. But it sits very tight. It doesn't wobble and doesn't fall out spontaneously. The insides of the glove box.

The entire glove box is made of fiberglass (fiberglass + epoxy). The entire underside of the torpedo is finished with the same material for greater structural strength. Here is a close-up of the part of the torpedo to the left of the rudder.

Actually, the steering wheel against the background of the rest of the torpedo.


The steering wheel is remade from some kind of Chinese or Turkish steering wheel, bought at the car market for 500 rubles. All plastic trim was peeled off the steering wheel to leave only the steel frame. Further, pieces of wood were glued to this frame piece by piece. Then - stain and varnishing in 10 layers. To shine. Steering wheel front view.

The button on the steering wheel deserves special attention. The Lada brand badge was cut out of a metal plate with a jigsaw. Then polished to a mirror finish and firmly glued into the button on the steering wheel with epoxy. This is the lining of the central tunnel.

Also wooden. It has three buttons. Left to right: button central lock(lock / unlock the door locks from the inside), a button for the electric trunk drive (I will write about the installation in a separate BZ entry), an on / off button for the rear view camera (when the rear view camera is turned off, the TV video input is automatically transferred to the radio). On the left side of the photo, an unscrewed part of the casing mounting on the gear lever (the screws are in the cup holder in the photo on the right). This is a temporary measure, because at the time of photographing I was engaged in putting the backstage and gearshift rods in order. I'm tired of the nasty creak-crunch emitted by the backstage mechanism with every gear change. At the time of this writing, this work has been successfully completed.
The VAZ 2109 panel is made of a special energy-absorbing material. It consists of an overlay and, in fact, the panel itself.
It is made from plastic. Its thickness is 3 mm. The overlay, in fact, is reinforced with a special metal frame. It has a reliable energy-absorbing layer made of polyurethane foam. On the outside, it is lined with a special decorative film. Low and high VAZ 2109 panels, as well as the Europanel, can be installed on the car.
The high panel VAZ 2109, like the low one, has certain features that should be considered when installing them. It should be noted that the “Europanel” and the high panel are practically identical in terms of the installation method, since the attachment points, as well as the connection of the air ducts of the automotive ventilation and heating system, are the same for them. The differences concern only the switching of the wiring harnesses. (shown in the photo below, follow the link to read more about it).


How to make an easy tuning of the VAZ-2109 dashboard with your own hands

During the salon of the domestic “nine”, tuning its “tidy” becomes truly indispensable element. Beautiful improvements can be done with your own hands. To do this, you need to make a new dial on a computer using special design programs and print the picture on a printer.
However, first it is necessary to think clearly appearance dials for the engine tachometer and speedometer, as well as for all the gauges that remained. When the dials are printed, they need to be laminated, and then you can proceed to remove the instrument panel.
To correct it, you must first remove the steering wheel pads, and also mark the steering position relative to the shaft. Then carefully unscrew the fixing nut.
Next, you can remove the steering wheel and unscrew the screws that are located in the area of \u200b\u200bthe automobile lower casing. After that, you have to disassemble steering column. When the dashboard is dismantled, unscrew the arrows from the old speedometer and tachometer. Subsequently, they will be fixed on the updated dials.
During the time, you can also repaint the dials and hands in bright colors. For this, ordinary cans of paint are suitable. At the same time, it is better to make the dial a rich black color.
You can make it dull with the help of special tools. In this case, the arrows must be painted in bright pink or original red-burgundy tones. After the painted plates of the machine dial have dried, they are completed with an old or pre-prepared scale and removed hands.
In a situation where the owner wants to modernize the instrument panel in a more modern way, he should also use a special (original, as in the video) backlight. You can make an original stroke using a fluorescent marker, but more on that below.

Every driver of a domestic car wants to make the instrument panel of his VAZ-2109 as bright and original as possible. Here is one of the options for how beautifully this element of the machine can be modified.
You will also need a fluorescent marker or paint. It will change color when exposed to ultraviolet light. This technique is often used in modern nightclubs. You will also need ordinary light bulbs with cartridges, like those in the "tidy". no need to change, they will remain in their places. Everything you need is there, you can start.

First you need to remove the plastic, after - the dashboard. Also, do not forget about the black plastic that is around the glass. We disassemble the standard insert, as well as the arrows. Most often, there are no holes in the new insert. Therefore, they will have to be made. For the arrows, the holes will need to be wider than in the regular overlay. Otherwise, the arrows will start to stick.
Next, you need to dismantle the backlight that is installed. Work should be done carefully so that the plastic is not damaged. We take out the board with light bulbs. We install a neon light bulb instead of the usual ones, and glue a plastic protection on top. Previously, factory bulbs were screwed on it. Do not forget about the control unit of the new neon light bulb. Always be careful not to reverse the polarity.
If this happens, nothing will shine. Next, you need to screw in the instrument illumination bulbs. This should be done in parallel to the neon lamp. From the inside we lay the wiring, first for this you need to make holes in the partitions.
We check if everything is correct. Light bulbs should be adjusted inside. Next, we put on the lining and glue it. After these steps, it remains for us to paint the arrows with a purchased fluorescent marker or paint. It is advisable to repeat the painting after 10 minutes. After that, the arrows can be installed in their place. This completes the tuning.
Check the work, otherwise you will have to disassemble everything. If there are no problems, you can collect everything in exactly the reverse order. After this, the VAZ 2109 will be equipped with a colorful panel like good foreign cars. If desired, with the help of fluorescent paint, you can paint the “tidy” overlay in the place where the arrow will reach its limit. It looks very nice.

How to change the panel backlight VAZ 2109
An experienced driver during a trip carefully looks not only at the road, but also at the dashboard. This is necessary in order to monitor the corresponding readings of the sensors that are responsible for the operation vehicle. It should be noted that its backlight should not tire and strain the eyes.
The manufacturer equipped the new machines with pale green or yellow backlighting. It has a certain effect on the eyes - after a certain period of time they get tired. In this situation, it is better to replace the factory instrument lighting. For similar tuning you will need a set of diodes, a soldering iron, screwdrivers with nozzles, gloves, and iron tongs. Then we need to choose the color of the highlight. There are many possible options, it all depends on the imagination.
However, as always in any work, this process has its own nuances. It is recommended to set soft white backlight if you use the car every day or for long trips. She won't tire her eyes. However, if you rarely use the car, then it is better to put bulbs in a different, most diverse color. Now let's start the installation.

First you need to completely remove the torpedo and disassemble the dashboard. To do this, we unscrew the screws that fasten the torpedo to the body. You can find out the number of them if you study the instruction manual for the car. It is possible that it is possible to remove the panel if only the lining is disconnected and the steering column is released all the way down.
Then we need to unscrew the bolts that are at the bottom of the lining. Using a screwdriver and a flat nozzle, pry off the instrument cluster and remove it. You should be especially careful, because you can accidentally damage the glass. After that, unscrew the bolts on the back side. Disconnect the glass, and then the plastic gasket.
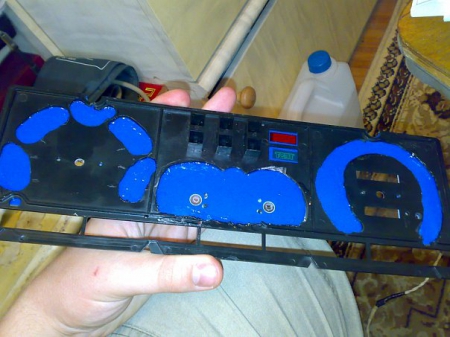
You do not need to touch the arrows, you should work carefully, because you can accidentally touch them or knock them down. If this happens, you will have to set them again and, even more difficult, adjust the sensors. When considering the back side of the light bulb, you can see the location of all lighting fixtures, including LEDs.
We circle them with a marker and solder them from the microcircuit. We check new light elements with an adapter or battery. It is better to use LEDs, because they will consume a small amount of energy, and they also have a long life. Then you need to inspect the metal antennae of the diodes so that they are intact. Otherwise, the diode will not glow. We insert both antennae of the diode into the hole of the microcircuit, which remained after the soldering of the previous light bulbs. From the back of the circuit, solder the antennae.
In the same way we mount the remaining diodes. Reassemble in reverse order. After we start the car, turn it on. Thus, we check how the installed LEDs function.

On the subject of backlight tuning dashboard VAZ 2109 option was considered LED backlight without serious intervention in the tidy. There we simply replaced the backlight lamps with LEDs, so although there is an effect, over time we want more. The expectation of more comes down to the fact that on the next generations of Samar devices and on foreign cars, the instrument dials are illuminated from the inside, and it looks as if the numbers and instrument scales themselves are lit. The instrument panels of the VAZ 2109, VAZ 2108 are illuminated by lamps that emit their light on the dials from the outside, from the side of the arrows, while the brightness and detail of such illumination is low.
Let's try to make the instrument panel illuminated from the inside, as on foreign cars, using the example of a high VAZ 2109 panel. It should be noted that tuned tidy in specialized firms are very expensive, so you can save a lot by modifying the instrument panel with your own hands.
To do this, we need a light-transmitting overlay on the instrument panel, like this one:
We remove from the car and disassemble the instrument panel, remove the instrument arrows and remove the old lining. In order for the backlight to hit the lining from the inside, we make cutouts on the surface under the lining. This can be done with a heated knife or soldering iron.


Now we make the backlight itself. It will be organized on the basis of LED strip. We use a tape that is cut into pieces of three diodes. For the uniformity of the glow, we make a reflector from ordinary foil.


For the speedometer and tachometer we take 3 pieces of tape each, one piece is enough for the fuel level and coolant temperature gauges.

We keep the standard backlight, as it illuminates the arrows on the instrument scales. It can also be upgraded by gluing an LED strip to the regular place of the backlight lamps, toning it a little, otherwise the backlight will be too bright. You can tint using a tint film, or a black marker, as described in this article. At the same time, it is advisable to leave the regular filter, the backlight light will be soft and uniform, with a slightly bluish tint.

We connect all this illumination to the contacts of the standard illumination lamp plate, having previously determined their polarity. To stabilize the current, when powering the LEDs, you can use
Tuning the dashboard of VAZ 2108, 2109, 21099 cars. How to make the backlight of the scale with your own hands?
Lamps are installed on the dashboards of VAZ 2109 and VAZ 2108 cars that illuminate the dial from the outside, that is, from the side of the arrows. Such a backlight does not always satisfy drivers because the brightness is low and the detail is fuzzy.
This article will discuss how you can make the backlight of the dashboard from the inside using the example of tuning the VAZ 2109 with your own hands. Of course, you can apply for tuning to a specialized company, they will quickly make a backlit panel like on foreign cars, but the cost of such work will be high. In order to save a lot on your car and make the desired backlight, you need to modify the instrument panel yourself, especially since there is nothing very complicated about it.
We make a do-it-yourself LED panel on a VAZ 2109

To customize the backlight of your car, you will need a light-transmitting overlay suitable for the instrument panel.
We remove and disassemble the instrument panel from the car. We remove all the arrows and the old lining, it will no longer be needed. Using a heated knife or soldering iron, you need to make cutouts on the purchased overlay so that the light from the backlight hits the instrument panel from the inside.
The backlight itself will be framed from LED strip. The tape must be cut into pieces of three diodes. To evenly distribute light over the entire surface, you need ordinary foil, which we distribute over the entire panel for appliances.
You will need 3 pieces of tape for the speedometer and tachometer, and one tape for the coolant temperature and fuel gauges.
This material is also related to the topic, which describes other solutions for upgrading your car.
photo report on tuning the dashboard
The old backlight should not be removed, as it will illuminate the instrument arrows. It can be slightly upgraded by gluing an LED strip in place of the standard lamps. It is better to tint the tape in advance, using a tint film or a black marker, otherwise the light will be too bright, which interferes with driving. It is advisable to leave the standard light filter as well, so the light will be more uniform, soft and with a bluish tint.
All installed backlight must be connected to the contacts on the plate of standard backlight lamps, in accordance with their polarity. There is a special driver, it stabilizes the current when washing the installed LEDs.
Now you need to check the operation of the resulting backlight, for this you need to apply a voltage of 12 V DC to it.

The first option requires the improvement of the fuel supply system by means of a mechanical assembly, namely a carburetor:
- Required to install throttle valve or diffuser of more updated models.
- Carefully remove the springs located in the primary chamber on the throttle actuator.
This kind of carburetor tuning significantly increases the air flow, allows the engine to "breathe", significantly improves its dynamics and power characteristics.
The second option involves the purchase and installation of a special unit - the controller. This device is a software carrier. Thanks to this, it is possible to increase power, torque and, of course, dynamics.
Implementation of suspension tuning VAZ-21099
It is necessary to update the VAZ suspension according to the scheme known to many car lovers:
- high-quality installation of two-section shock absorbers;
- replacement product of transverse type stabilizers;
- installation of updated brake discs;
- installation of an updated hub;
- the product of the replacement of hinges by spherical ones;
- carrying out the suspension lifting procedure by installing advanced versions of the springs.
Cabin tuning for VAZ-21099
This procedure conditionally consists of two stages:
- Replacing the seats with new ones / upgrading the regular front ones. For example, summing up the heating system, fitting with high-quality modern fabric.
- Upholstery update. Such innovations are easy to make on your own or by purchasing a new set in a ready-made form.
- Installation of curly carbon inserts (you can choose wooden, plastic, chrome, etc.) on the side panels of car doors. Thanks to this, the car inside will look more representative and chic.
Finally, it is worth paying the attention of readers to the fact that the work of tuning the VAZ-21099 interior on its own is more a creative process than a technical one. Here you will need to show a lot of patience, accuracy and accuracy in decisions, in order to get high-quality tuning as a result, which can make a proper impression both on the owner of the car and on strangers.
Related Articles